Peach Tart Recipe: 7 Easy Steps for a Juicy Summer Treat
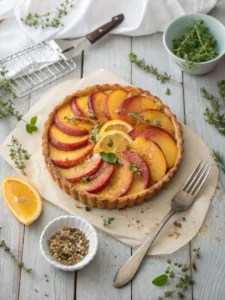
Craving the perfect summer dessert? This peach tart recipe has 7 simple steps for a juicy, flaky treat your whole family will love. Try it today!
Craving the perfect summer dessert? This peach tart recipe has 7 simple steps for a juicy, flaky treat your whole family will love. Try it today!

Introduction Moist, buttery, and bursting with juicy blueberries—this Blueberry Pound Cake Recipe is the kind of dessert that makes you stop mid-bite and go, “Wow!”

How to make maple butter might just be your next kitchen obsession—imagine a creamy, golden spread that’s sweet, rich, and ridiculously easy to whip up!

Discover easy frozen broccoli recipes perfect for busy weeknights. Learn how to transform this versatile veggie into delicious side dishes and main courses in under 30 minutes

Discover delicious recipes with bone broth to create nourishing meals at home. Learn how to make hearty soups, flavorful risottos, and savory stews using this nutritious base.

Discover the perfect homemade chex mix recipe oven with these 5 delicious seasoning combinations. Learn how to make this crunchy snack with our step-by-step guide

Discover how to make refreshing cucumber water recipe with 4 natural flavor enhancers. Learn the health benefits and best ingredients for this hydrating summer drink

Discover a classic anise cookie recipe with 5 delicious flavor variations that will elevate your holiday baking. Learn expert tips for perfectly crisp, licorice-scented treats you’ll love

Learn how to craft the perfect mezcal margarita recipe with our easy-to-follow guide. Discover three unique variations of this smoky twist on the classic cocktail that will impress your guests

Discover a delicious chicken and kale recipe perfect for busy weeknights. Learn how to create a nutritious, flavor-packed dinner using simple ingredients in just three easy steps