How to Make Maple Butter in 5 Easy Steps

How to make maple butter might just be your next kitchen obsession—imagine a creamy, golden spread that’s sweet, rich, and ridiculously easy to whip up! I’ll never forget the first time I tried it: a crisp autumn morning, the scent of maple wafting through the house, and my kids hovering for a taste. What’s so special about this recipe? It takes one humble ingredient—maple syrup—and turns it into a velvety delight in just five steps. Perfect for busy mornings or cozy family brunches, this 15-minute wonder is simpler than my fan-favorite cinnamon honey butter but brings its own unique charm. Ready to spread some joy? Let’s dive into this maple magic together!

What Is Maple Butter?

So, what’s this thing called maple butter? Is it butter with a maple twist? Nope! It’s a smooth, spreadable delight made purely from maple syrup—think of it as syrup’s cooler, creamier cousin. I like to joke it’s what happens when syrup grows up and gets fancy. Ever wonder where the name came from? It’s all about that buttery texture, no dairy required! As the saying goes, “the way to a man’s heart is through his stomach,” and this sweet spread proves it. Whether you’re slathering it on pancakes or sneaking a spoonful, it’s irresistible. Curious? Give it a whirl and see why it’s a kitchen must-have!

Why You’ll Love This Maple Butter

Maple butter is a total standout, and here’s why. First, its creamy texture and deep, caramel-like flavor turn any dish into a treat—think pancakes, waffles, or even a plain biscuit. Second, making it at home saves you cash—no need to splurge on pricey store-bought jars when you can master how to make maple butter with one affordable ingredient. Third, the pure maple syrup shines through, giving you that natural sweetness with no additives. Compared to my honey butter recipe, this one’s got a bolder, woodsy kick. It’s simple, budget-friendly, and bursting with flavor—perfect for cozy mornings or impressing guests. Ready to whip it up? Let’s get started!

How to Make Maple Butter

Quick Overview

This maple butter recipe is a breeze—five steps, 15 minutes, and you’ve got a delicious spread that’s smooth, sweet, and satisfying. It’s all about transforming pure maple syrup into a rich, creamy texture with minimal effort. No complicated techniques, just a little heat and whisking magic. Whether you’re craving a quick topping or a homemade gift, this recipe delivers every time.

Key Ingredients for Maple Butter

  • 1 cup pure maple syrup (go for Grade A for the best flavor; avoid imitation syrups)
  • Pinch of sea salt (optional, enhances sweetness—about 1/8 teaspoon)
  • 1 tablespoon heavy cream (optional, for extra creaminess)

Step-by-Step Instructions

How to Make Maple Butter
  1. Gather Your Ingredients
    Grab your maple syrup, salt (if using), and cream (if you’re feeling fancy). Set up a small saucepan, a candy thermometer, and a whisk or hand mixer. Keeping everything ready makes this a smooth ride.
  2. Heat the Maple Syrup
    Pour the maple syrup into the saucepan over medium heat. Clip on your candy thermometer and stir occasionally. Heat it to 235°F (soft-ball stage)—this takes about 8-10 minutes. Watch closely; it’ll bubble up but shouldn’t boil over. If it darkens too fast, lower the heat.
  3. Cool It Down
    Remove the pan from the heat once it hits 235°F. Let it cool to about 100°F (lukewarm)—this takes 5-7 minutes. Don’t rush it; cooling helps the texture set. Stir gently now and then to release heat evenly.
  4. Whip It Up
    Once cooled, start whisking! Use a hand mixer or whisk vigorously by hand for 3-5 minutes. You’ll see it turn pale and creamy. If it’s too thick, add a splash of cream; too thin, whip longer. This is where the magic happens—patience pays off!
  5. Store and Enjoy
    Spoon your maple butter into a clean jar. It’s ready to spread! Pop it in the fridge to firm up slightly, or enjoy it soft and fresh. Slather it on toast, swirl it into oatmeal, or gift it to a lucky friend.

What to Serve Maple Butter With

Maple butter pairs like a dream with so many dishes. Spread it on warm buttermilk pancakes or fluffy waffles for a classic combo. Try it with crusty sourdough bread or flaky croissants for a simple treat. For a fun twist, dollop it on roasted sweet potatoes—the sweet-savory mix is divine. Pair it with a hot cup of coffee or chai tea to balance the richness. It’s versatile enough for breakfast, snacks, or even dessert—think apple slices dipped in this golden goodness!

Need more ideas? Seasons and Suppers has great suggestions for using maple butter on everything from squash to scones!

Top Tips for Perfecting Maple Butter

  • Use Pure Maple Syrup: Imitation won’t work—it lacks the natural sugars needed to thicken. Splurge on the good stuff!
  • Watch the Temp: Overheating past 235°F can make it grainy. Keep that thermometer handy.
  • Whip While Cool: Start whisking too soon, and it won’t set; too late, and it hardens. Aim for 100°F.
  • Fix Graininess: If it’s gritty, reheat gently to 235°F, cool again, and whip. Patience is key!
  • Substitutions: No cream? A tiny pat of butter works too. Want a twist? Add a pinch of cinnamon.
  • Avoid Rushing: Let each step breathe—rushing leads to a runny mess.

These tricks make how to make maple butter foolproof, whether you’re a newbie or a pro.

For more clever swaps, Olives + Thyme shares handy tips to tweak your maple butter just right.

Storing and Reheating Tips

Got leftovers? Store your maple butter in an airtight jar in the fridge—it stays fresh for up to 1 month. The cold firms it up, so let it sit at room temp for 10 minutes before spreading. For longer storage, freeze it in a small container for up to 3 months—thaw overnight in the fridge when you’re ready. Reheating isn’t usually needed, but if it separates, warm it gently in a double boiler (low heat) and whisk until smooth. Avoid microwaving—it can ruin the texture. With proper care, this sweet spread stays delicious for weeks!

Conclusion

There you have it—how to make maple butter in five easy steps! From heating the syrup to whipping up that creamy goodness, this recipe is a quick win for any kitchen. It’s simple, affordable, and packed with that cozy maple flavor we all crave. Whether you’re topping breakfast or sneaking a spoonful straight from the jar, it’s a treat worth making. Give it a try and let me know how it goes—I’d love to hear your favorite ways to enjoy it! Hungry for more? Check out my other recipes for sweet inspiration. Happy cooking!

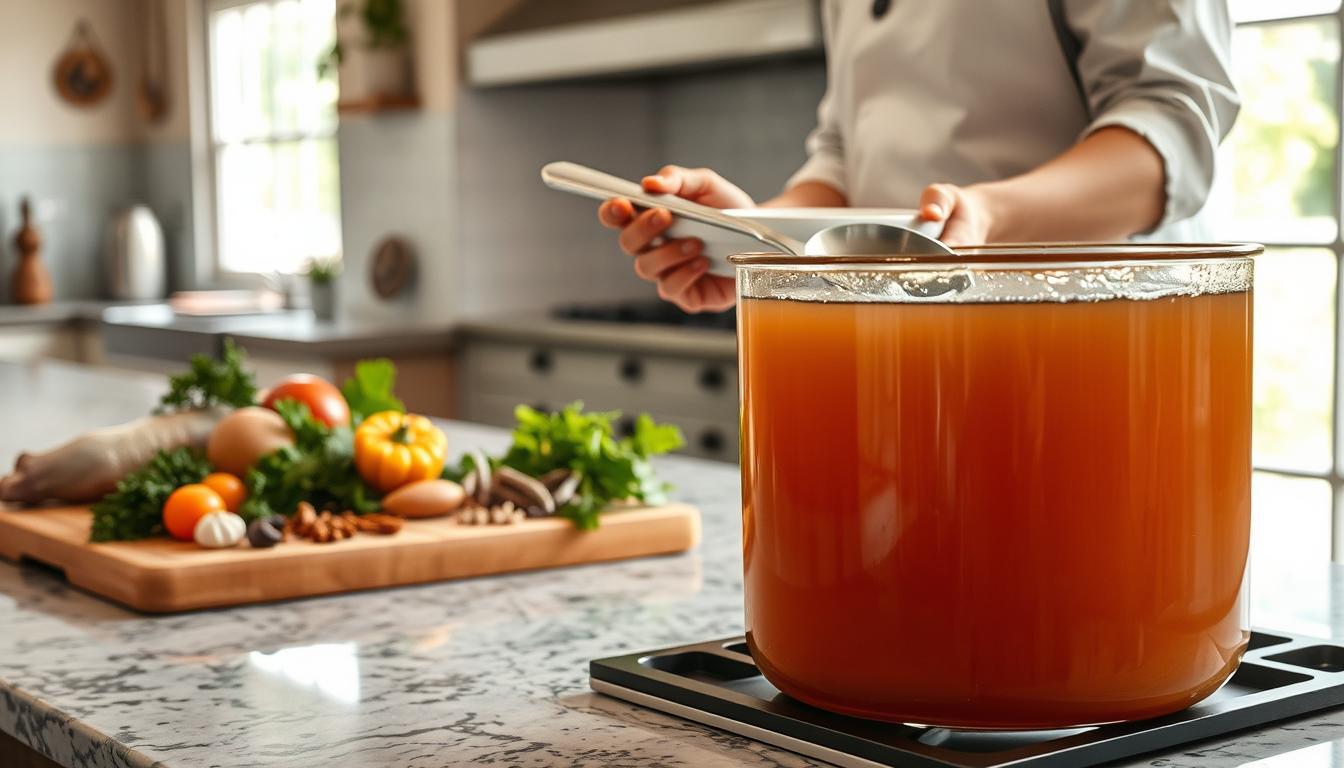
Recipes with Bone Broth: How to Cook 3 Hearty Meals

Every kitchen has a secret that makes meals special. For me, that secret is bone broth. It’s a liquid gold that makes home cooking taste like restaurant food. Recipes with bone broth are not just tasty; they’re also good for you.

Bone broth does more than just taste good. It’s full of nutrients like collagen, minerals, and amino acids. These help keep you healthy. Whether you love cooking or want to eat healthier, bone broth recipes are perfect for you.

In this guide, we’ll show you three hearty meals that use bone broth. You’ll learn to make simple ingredients into dishes that wow your loved ones.

Key Takeaways

  • Bone broth provides exceptional nutritional value
  • Versatile ingredient for multiple cuisine styles
  • Easy to prepare with minimal kitchen skills
  • Supports gut health and immune function
  • Can be stored for extended periods
  • Enhances flavor of multiple dish types

Understanding the Power of Bone Broth in Cooking

Bone broth is more than just a base for soups and stews. It’s a nutritional powerhouse that turns animal bones into a health-boosting elixir. This ancient tradition is packed with benefits for your health.

Nutritional Benefits of Bone Broth

Explore the world of bone broth protein and its amazing nutritional profile. A single serving has about 10 grams of protein, which is 20% of your daily needs. This is way more than regular chicken broth’s 4.8 grams.

  • Rich in bone broth collagen
  • Supports bone broth gut health
  • Low in calories (about 79.2 per serving)
  • Minimal fat content (0.504 grams)

Why Bone Broth Outperforms Regular Stock

Traditional stocks can’t compare to bone broth’s nutritional value. By simmering bones for 12-24 hours, you get a lot of minerals, amino acids, and proteins. This process releases nutrients that boost your overall health.

Essential Components of Quality Bone Broth

Making great bone broth takes care and attention. Look for broths that are simmered slowly, have low sodium, and use bones from grass-fed animals. The amino acids in it can help you sleep better and reduce inflammation.

  • Simmered 12-24 hours
  • Contains essential amino acids
  • Supports digestive health
  • Provides natural inflammation reduction

Adding bone broth to your meals does more than just add flavor. It’s a nutrient-rich ingredient that supports your health and wellness.

Essential Ingredients and Equipment for Bone Broth Making

Starting a bone broth diet is easy with the right ingredients and tools. Your journey in the kitchen begins with key items. These turn simple bones into a healing drink.

Here are the main ingredients you’ll need:

  • High-quality animal bones (beef, chicken, or fish)
  • Filtered water
  • Apple cider vinegar
  • Fresh vegetables like onions, carrots, and celery
  • Herbs and seasonings

For making bone broth, you’ll also need some important tools:

  1. Large stockpot or slow cooker
  2. Fine-mesh strainer
  3. Storage containers
  4. Optional pressure cooker for faster preparation

Starting a bone broth diet can be budget-friendly. Soup bones are about $1 per pound at most grocery stores. A basic pressure cooker costs around $45. This makes making bone broth at home both affordable and easy.

Knowing what ingredients and tools to use will help you make a healthy bone broth. It’s perfect for your health and fits well with paleo or traditional diets.

Basic Bone Broth Preparation Technique

Making perfect bone broth needs focus and patience. It’s key for those on keto diets or looking to lose weight. Knowing the basic steps is essential.

Selecting and Preparing the Bones

Picking the right bones is the first step. Here are some tips:

  • Choose grass-fed beef bones or organic chicken carcasses
  • Mix different bones for a richer flavor
  • Roast bones at 400°F for 30-60 minutes before simmering
  • Use a mix of marrow, joint, and meaty bones

Cooking Times and Temperature Guidelines

Bone broth needs slow cooking to get all the nutrients. Here’s how to do it right:

  1. Simmer for 12-24 hours on low heat
  2. Keep the temperature between 180-200°F
  3. Use a slow cooker or stockpot for steady results
  4. Remove any foam in the beginning

Straining and Storage Methods

Straining and storing properly keeps your broth fresh and full of nutrients. Here’s what to do:

  • Strain through a fine-mesh strainer or cheesecloth
  • Cool the broth quickly to stop bacteria growth
  • Store it in airtight containers
  • Keep it in the fridge for up to 5 days
  • Freeze it in portions for up to 6 months

Pro tip: Freeze bone broth in ice cube trays. It’s great for easy recipe additions, helping with keto meal planning or weight loss.

Recipes with Bone Broth: Main Course Variations

Bone broth makes simple recipes into amazing dishes. It adds depth, nutrition, and flavor to your main courses. Whether you’re cooking at home or love food, bone broth soup recipes are perfect for memorable meals.

Bone broth is amazing because it makes dishes better in many ways. It can turn simple stews into fancy risottos. This shows how one ingredient can change your cooking.

  • Risotto with mushrooms and bone broth
  • Braised short ribs using bone broth
  • Asian-style ramen bowl

Each recipe shows a different way to use bone broth in main dishes. The nutritional profile of bone broth makes it more than just a liquid. It’s a source of important nutrients that can make your meals special.

Exploring these recipes with bone broth will show you how to make dishes like restaurants. The next sections will give you step-by-step guides for these delicious main courses.

Hearty Bone Broth Risotto with Mushrooms

Take your cooking to the next level with this luxurious bone broth risotto. It turns a simple dish into a nutritious masterpiece. Recipes with bone broth add depth of flavor and health benefits that wow home chefs.

This risotto shows how versatile bone broth can be. It makes an ordinary meal into an extraordinary experience. The dish’s rich texture and flavor make it a standout in home cooking.

Key Ingredients for Perfect Risotto

  • 1.5 cups Arborio rice
  • 1.5 pounds mixed mushrooms
  • 6 cups bone broth
  • 0.75 cups dry white wine
  • 2 medium onions, chopped
  • 4 tablespoons unsalted butter
  • 2 tablespoons olive oil
  • 0.5 ounces dried porcini mushrooms

Step-by-Step Cooking Process

The secret to great bone broth benefits is in the preparation. Begin by sautéing onions and garlic until they’re translucent. Then, add mushrooms and cook for 8 minutes. Next, add Arborio rice and toast it gently before deglazing with white wine.

  1. Heat olive oil in a large pan
  2. Sauté onions for 5-8 minutes
  3. Add chopped mushrooms
  4. Stir in Arborio rice
  5. Gradually add warm bone broth
  6. Stir constantly until creamy

Serving Suggestions and Garnishes

Finish your risotto with grated Parmesan, fresh parsley, and olive oil. This dish serves 4-6 people and has about 618 calories per serving.

Pro tip: Store leftovers in an airtight container in the fridge for up to 3 days. This way, you can enjoy this delicious bone broth recipe again and again.

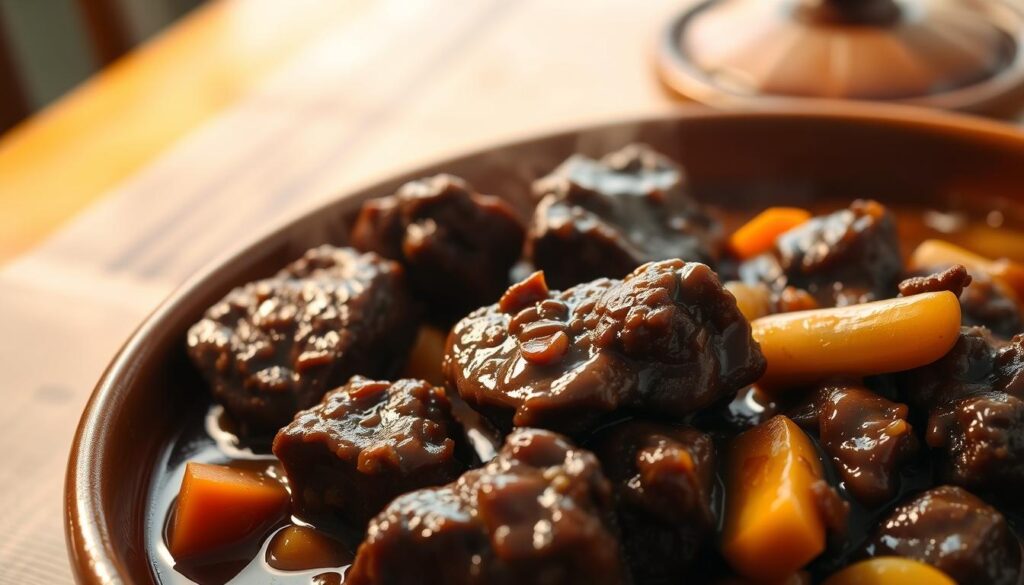
Rich Bone Broth Braised Short Ribs

Bone Broth Braised Short Ribs

Discover the ultimate comfort food that turns tough meat into a melt-in-your-mouth delicacy. Bone broth protein and collagen work magic in this braising technique. It creates incredibly tender short ribs that fall right off the bone.

The secret to perfect braised short ribs is in the ingredients and slow-cooking. Choose bone-in short ribs that are at least 1½ inches thick. This lets the bone broth collagen tenderize the meat.

Key Ingredients for Success

  • 5 pounds meaty bone-in short ribs
  • 2 tablespoons kosher salt
  • 1 bottle of dry red wine
  • 4 cups beef stock rich in bone broth protein
  • Fresh herbs for additional flavor

Your cooking technique is key. Start by searing the ribs to lock in flavor. Then, slowly braise them in a bone broth mixture. This method breaks down tough muscle fibers, making the dish incredibly rich and tender.

Cooking Technique

  1. Brown ribs for 45 seconds per side
  2. Add vegetables and herbs
  3. Pour in bone broth and wine
  4. Slow cook at 350°F for 2 hours
  5. Reduce heat to 325°F for additional 30-45 minutes

Pro tip: Let the ribs rest for 20 minutes before serving. This allows the bone broth collagen to settle. It creates a luscious, rich sauce that will impress even the most discerning food lovers.

Bone Broth Asian-Style Ramen Bowl

Making an Asian-style ramen bowl with bone broth turns a simple meal into a healthy feast. Bone broth soup recipes add a deep, rich flavor to ramen. This dish not only tastes great but also boosts gut health with its nutrients.

Traditional Ramen Components

A classic ramen bowl has several key parts for a balanced flavor:

  • 4 cups of rich bone broth base
  • 2 packages of instant ramen noodles (without seasoning packet)
  • 3 teaspoons grated ginger
  • 4 teaspoons grated garlic
  • 1 ounce dried shiitake mushrooms

Protein and Vegetable Options

You can add your favorite protein and veggies to make it your own:

  • Protein choices:
    • Shredded chicken
    • Shrimp
    • Soft-boiled egg
  • Vegetable options:
    • 2 cups chopped kale
    • 1 cup shredded carrots
    • Bok choy

Assembly and Presentation Tips

To make your ramen look like it came from a restaurant, follow these tips:

  1. Layer noodles in a large bowl
  2. Pour hot bone broth over noodles
  3. Add protein and vegetables
  4. Top with crunchy panko crumbs
  5. Garnish with optional toppings like:
    • Scallions
    • Sesame seeds
    • Nori strips
    • Sriracha sauce

Your homemade ramen bowl has about 456 calories and 42.4 grams of protein. It’s a healthy and filling meal that’s good for your gut thanks to bone broth.

Tips for Enhancing Bone Broth Flavors

Bone Broth Flavor Enhancements

Turning your bone broth diet into a fun cooking journey starts with improving its taste. Whether you’re into bone broth paleo or just want tasty meals, adding the right ingredients can help a lot.

Here are some ways to make your bone broth even better:

  • Add fresh herbs like rosemary, thyme, and parsley for extra depth
  • Try warming spices like ginger, turmeric, and cayenne for more complexity
  • Garlic and onions add rich flavors
  • Don’t forget healthy fats like grass-fed butter and coconut oil

The bone broth paleo crowd says to use top-notch, organic stuff for the best nutrition. Roasting bones first makes your broth taste richer and more complex.

Here are some tasty bone broth ideas:

  1. Asian-style with ginger and star anise
  2. Mediterranean mix with oregano and lemon zest
  3. Spicy Mexican with cumin and chili powder

Remember, making the perfect bone broth takes time and trying new things. Start with small changes and adjust until it’s just right for you.

Conclusion

Exploring bone broth opens a world of nutrition. It’s great for keto diets and can help with weight loss. This ingredient makes meals not just tasty but also packed with nutrients.

The amino acids in bone broth, like glycine and proline, do more than add flavor. They help with overall health and wellness.

Bone broth is high in protein, which helps with weight loss. Studies show it can improve muscle and skin health. It makes dishes like risotto, short ribs, and ramen even better.

Adding bone broth to your meals is more than cooking. It’s a way to support your joints, gut, and even help with weight. Try different bones and recipes to see its full benefits.

Tagged : / / / / / / / / /

Chex Mix Recipe Oven: Top 5 Seasonings to Try

Imagine stepping into a kitchen filled with the warm, savory smell of homemade Chex Mix. The cereals are crisp, toasted to perfection, and covered in irresistible seasonings. This mix promises a snacking experience that turns a simple moment into something special.

Making the perfect oven-baked snack mix is more than just following a recipe. It’s about creating a culinary adventure that brings people together. Your homemade Chex Mix can be the highlight of movie nights, game days, or spontaneous gatherings. It’s the perfect treat for when friends and family want something delicious and crunchy.

This guide will show you five amazing seasoning variations to take your chex mix recipe oven technique to the next level. Whether you’re an experienced cook or just starting out, you’ll learn how to make an oven-baked snack mix that everyone will enjoy.

Key Takeaways

  • Master the art of creating delicious homemade Chex Mix
  • Explore five unique seasoning combinations
  • Learn professional baking techniques for perfect crunch
  • Discover versatile recipes for various occasions
  • Understand how to customize your snack mix

Essential Ingredients for Perfect Oven-Baked Chex Mix

To make the ultimate party mix, you need to pick the right ingredients and tools. Your mix will be amazing with the right cereals, nuts, and seasonings. Let’s look at what makes a great chex cereal mix.

Base Cereals and Snacks

The base of any good Chex Mix is crunchy ingredients. Here’s what you’ll need:

  • 9 cups of Chex cereal (mix of corn, rice, and wheat)
  • 1.5 cups of cheese crackers
  • 1.5 cups of mini pretzel twists
  • 1 cup of mixed nuts (peanuts or almonds)
  • 1 cup of oyster crackers

Traditional Seasonings and Spices

Turn your base ingredients into a tasty snack mix with these seasonings:

  • ½ cup unsalted butter, melted
  • 3 tablespoons Worcestershire sauce
  • 2 teaspoons seasoned salt
  • 1.5 teaspoons garlic powder
  • ½ teaspoon onion powder
  • Optional: ¼ teaspoon cayenne pepper for extra heat

Required Kitchen Tools

Get your kitchen ready with these tools for a perfect mix:

  1. Large mixing bowl
  2. Baking sheet with raised edges
  3. Wooden spoon or spatula
  4. Measuring cups and spoons
  5. Oven mitts

With these ingredients and tools, you’re set to make a delicious party mix. It will impress your guests and satisfy your snack cravings.

Step-by-Step Chex Mix Recipe Oven Instructions

Making easy chex mix at home is easier than you think. With a few simple steps, you can make a tasty baked chex mix. It’s just as good as store-bought ones. Follow these steps for a crispy and flavorful homemade chex mix.

Here’s what you’ll need to get started:

  • Corn Chex
  • Rice Chex
  • Wheat Chex
  • Pretzels
  • Nuts (cashews or peanuts)
  • Melted butter
  • Seasonings

First, preheat your oven to 250°F. This low heat helps your chex mix get crispy without burning. Mix your dry ingredients in a big bowl. This base will soak up the tasty seasonings.

  1. Mix 2 cups each of corn snacks, cheese crackers, and pretzels
  2. Add 1 cup of your favorite nuts
  3. Whisk ½ cup melted butter with seasonings
  4. Pour butter mixture over dry ingredients
  5. Stir to coat everything evenly

Spread the mix on a big baking sheet. Pro tip: Make sure everything is in one layer for even baking. Bake for 1 hour, stirring every 15 minutes. This prevents burning and keeps it crispy.

Your homemade chex mix is done when it’s golden brown and crunchy. Store it in an airtight container for up to two weeks. But it might not last that long!

Classic Butter and Worcestershire Seasoning Blend

Making the perfect Chex mix starts with a special seasoning blend. This blend turns a simple snack into a favorite treat. It’s all about the mix of ingredients.

Creating an authentic Chex mix is all about the flavors. Your seasoning mix should include:

  • 12 tablespoons (1.5 sticks) of unsalted butter
  • 4 tablespoons Worcestershire sauce
  • 2 teaspoons seasoning salt
  • 1 teaspoon garlic powder
  • 1 teaspoon onion powder

Proper Butter-to-Seasoning Ratios

Getting the right amount of butter and seasoning is key. You need enough butter to make the seasonings stick. This way, every bite is full of flavor.

Mixing and Coating Techniques

To coat your Chex mix well, follow these steps:

  1. Melt butter completely before adding seasonings
  2. Whisk Worcestershire sauce and dry spices into melted butter
  3. Drizzle the mixture over your cereal mix
  4. Gently fold to ensure every piece gets coated

Your homemade Chex mix will taste like it came from a restaurant. It’s all about the perfect mix of buttery and zesty flavors.

Savory Garlic and Onion Seasoning Variation

Homemade Chex Mix with Garlic and Onion Seasoning

Make your homemade Chex Mix even better with a bold garlic and onion seasoning. It turns your party mix into a snack full of flavor. This mix will have everyone wanting more.

To make an amazing garlic and onion Chex Mix, balance your seasonings well. Start with these key ingredients:

  • 4 teaspoons of garlic powder
  • 4 teaspoons of onion powder
  • 4 teaspoons of seasoning salt
  • 6-8 tablespoons of Worcestershire sauce

When making your Chex Mix, mix these seasonings well with 2-3 sticks of melted butter. The butter makes the Chex cereal, garlic bagel chips, and pretzels rich and evenly coated.

Pro tip: Add grated Parmesan cheese or dried herbs like parsley and thyme for more flavor. These add-ons can make the garlic and onion taste even better without overpowering the mix.

Bake your mix at 250°F, stirring every 15 minutes for even cooking. It takes about 1 hour and 15 minutes to cook. You’ll get around 18 servings of this tasty party mix.

Spicy Cajun-Style Seasoning Mix

Turn your usual oven-baked snack mix into a spicy Cajun adventure. This version adds bold flavors and a spicy kick to your favorite snack.

Making a spicy Cajun seasoning mix needs careful balance. You want to create a flavor that excites your taste buds but doesn’t overwhelm them.

Crafting the Perfect Heat Level

Getting the right heat in your Cajun-style snack mix is an art. Start with these key ingredients:

  • Cayenne pepper (main heat source)
  • Smoked paprika
  • Dried thyme
  • Garlic powder
  • Onion powder

Complementary Spice Combinations

Try these spice ratios for different heat levels:

  1. Mild Heat: 1/2 teaspoon cayenne
  2. Medium Heat: 1 teaspoon cayenne
  3. Spicy Kick: 1 1/2 teaspoons cayenne

Pro tip: Taste and adjust your seasoning mix little by little. Remember, you can add more heat, but you can’t take it away once it’s mixed.

Ranch and Parmesan Seasoning Combination

Ranch Parmesan Chex Mix

Make a tasty easy chex mix with a creamy ranch and parmesan twist. It turns your usual snack mix into a gourmet delight. This mix adds rich, tangy flavors that make your homemade snack even better.

To make this tasty mix, you’ll need some important ingredients:

  • 1 (1-ounce) package of dry ranch dressing mix
  • 1/2 cup grated parmesan cheese
  • 3/4 cup unsalted butter
  • 4 cups Rice Chex cereal

The key to a great ranch and parmesan easy chex mix is even seasoning. Gently coat each piece to ensure maximum flavor absorption. Sprinkle the ranch mix and parmesan cheese over your snack mix before baking.

Here’s how to prepare your chex mix:

  1. Melt butter completely
  2. Mix in ranch seasoning
  3. Fold in parmesan cheese
  4. Pour mixture over cereal and crackers
  5. Stir until all pieces are well-coated

Bake at 300°F for 45 minutes, stirring every 15 minutes. This ensures even cooking. The result is a crispy, flavorful snack mix that’s a hit at parties or family gatherings.

Tips for Even Baking and Proper Storage

Making the perfect homemade Chex Mix is more than just mixing ingredients. Learning how to bake and store it right can make a big difference. It can turn your baked Chex mix from good to great.

Temperature Control for Perfect Crispiness

For the best homemade Chex mix, bake slowly and at a low temperature. Bake at 250°F for about an hour. This ensures it cooks evenly and stays crunchy.

Here are some important tips:

  • Stir the mix every 15-20 minutes to prevent burning
  • Use a large, flat baking sheet for uniform heat distribution
  • Spread ingredients in a single layer to promote crisp texture

Storage Solutions for Maximum Freshness

Keeping your baked Chex mix fresh is key. Here are some expert tips:

  • Use airtight containers to prevent moisture absorption
  • Store at room temperature for up to 7-10 days
  • Consider freezing for extended preservation (up to 3 months)

When freezing, use a freezer-safe container. Let the mix cool completely before sealing. Thaw at room temperature to keep it fresh and flavorful.

Customizing Your Mix with Additional Ingredients

Making your own party mix recipe lets you turn a classic Chex cereal mix into something special. You can add your favorite ingredients to make it truly yours. This way, you can enjoy a snack that shows off your unique taste.

Here are some fun mix-in options to make your party mix recipe stand out:

  • Crunchy Additions
    • Bagel chips
    • Corn chips
    • Cheez-Its
    • Goldfish crackers
    • Soup crackers
  • Nuts and Protein Options
    • Peanuts
    • Almonds
    • Cashews
    • Pecans
  • Sweet Surprises
    • Raisins
    • Chocolate chips
    • Dried cranberries

When adding new ingredients, it’s key to balance flavors and textures. Start with a little and adjust as needed. For those with dietary needs, choose gluten-free Chex and nut-free options so everyone can enjoy it.

Pro tip: When adding new ingredients, reduce the original recipe’s components proportionally. This keeps your mix crunchy and flavorful.

Making Large Batches for Parties and Events

Hosting a big gathering and want to impress your guests? Oven-baked snack mix is perfect for a crowd. You can make huge batches of Chex Mix that everyone will love.

Scaling Up Your Recipe

For big batches of Chex Mix, follow these tips:

  • Aim to make 12-14 cups per batch
  • Use multiple baking sheets for even cooking
  • Keep the same seasoning ratios as your original recipe

Make-Ahead Strategies

Planning ahead saves time and stress. Here are some smart tips:

  1. Prepare the mix up to one week before your event
  2. Store in airtight containers at room temperature
  3. Keep it fresh in a cool, dry place

For big events, make multiple batches ahead. Your snack mix can last up to 4 weeks. Stir every 15 minutes for even coating and crunch.

Conclusion

Your journey to make homemade Chex Mix is just starting. It’s a fun adventure that lets you try new flavors and mix-ins. By learning how to make Chex Mix in the oven, you’ve opened up a world of tasty snacks.

Homemade Chex Mix is all about being flexible. You can make it with classic flavors or try something new like Cajun-style. It’s perfect for game days or a quick snack, impressing everyone with its fresh taste and your special touch.

Creating the best Chex Mix is all about having fun and trying new things. Start with a basic recipe and then get creative. Add your favorite seasonings, unique ingredients, or change the baking time. Your perfect Chex Mix is waiting to be found, one batch at a time.

Now you’re ready to become a Chex Mix expert. Enjoy making your own snacks and share them with others. Happy mixing!

Tagged : / / / / / / /

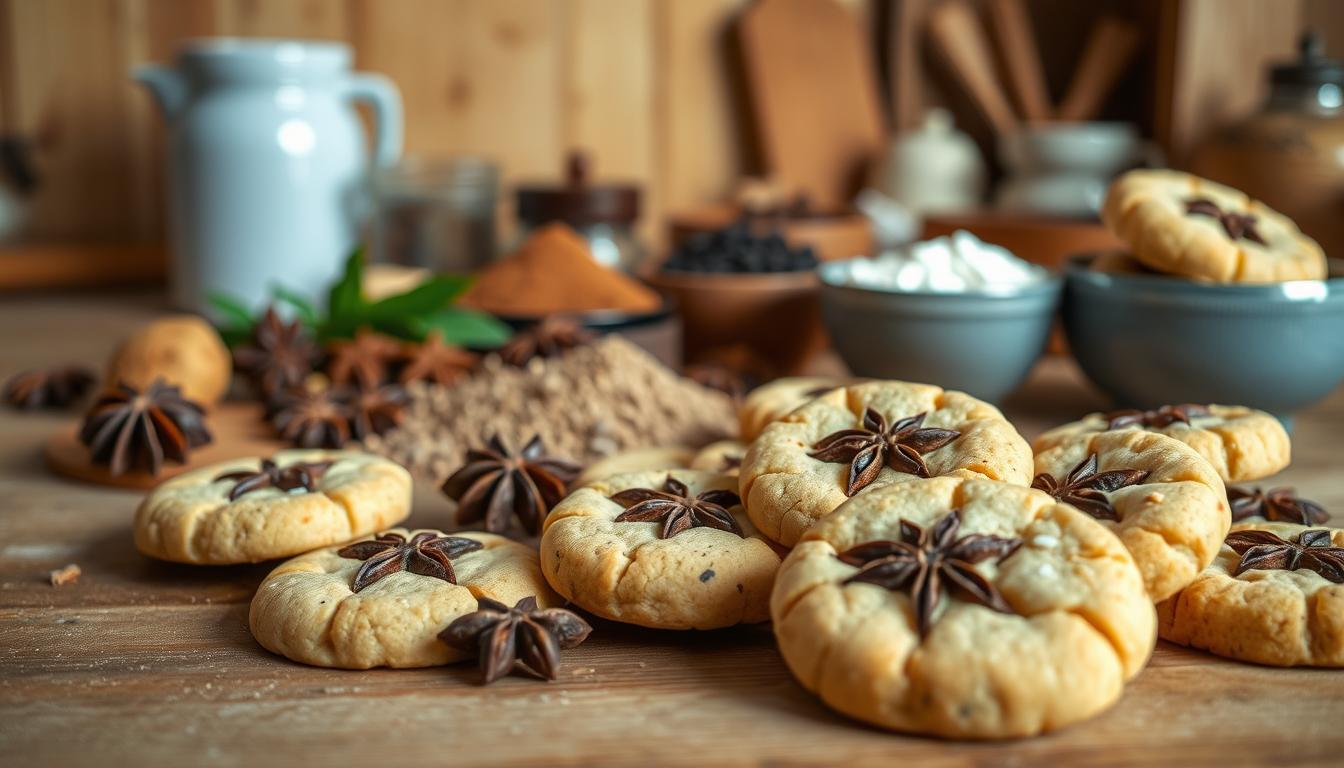
Anise Cookie Recipe: Top 5 Flavors to Add Now

Baking connects us to our past. My grandmother’s kitchen was filled with the scent of anise cookies during holidays. These cookies were more than treats; they were a tradition waiting to be shared.

Think about making your anise cookie recipe even better. With a few tweaks, you can turn these Italian classics into something special. Whether you’re an experienced baker or just starting, learning to make perfect anise cookies can make your kitchen a place of joy.

Key Takeaways

  • Anise cookies offer a unique licorice-like flavor profile
  • Traditional recipes can be easily modernized
  • Homemade anise cookies make perfect holiday gifts
  • Multiple flavor variations can enhance classic recipes
  • Baking time and temperature are crucial for perfect texture

Understanding the Magic of Traditional Anise Cookies

Explore the world of anise cookies, a tradition that brings families together. These treats are rooted in Italian baking, connecting generations with their unique flavor.

The Italian Baking Heritage

Anise cookies are more than a sweet snack. They take you on a journey through ancient Mediterranean cooking. The Pimpinella anisum plant, used to make anise extract, has been a key ingredient for centuries.

  • Originated in Mediterranean kitchens
  • Passed down through family recipes
  • Represents cultural culinary traditions

What Makes Anise Cookies Special

The magic of anise cookies comes from their unique taste. Anethole, the main aromatic compound, gives them a sweet, licorice-like flavor. This makes them stand out from other desserts.

Baking anise biscuit ingredients is more than making cookies. It’s creating a sensory experience that connects you to deep cultural traditions.

Cultural Significance in Holiday Baking

Anise cookies are a favorite during holidays. Their special flavor and family ties make them a nostalgic connection to heritage.

These cookies bring people together, whether at festive gatherings or quiet family moments. They carry a delicious tradition across generations.

Essential Ingredients for Perfect Anise Cookie Recipe

To make the perfect anise cookie, you need the right ingredients. They must work together for a great taste and texture. Each part plays a key role in baking.

Here’s what you’ll need for your anise cookie recipe:

  • All-purpose flour (3 cups)
  • Granulated sugar (1 cup)
  • Unsalted butter (½ cup, softened)
  • Large eggs (3)
  • Anise extract (1 tablespoon)
  • Baking powder (1 tablespoon)
  • Salt (¼ teaspoon)

The anise extract is the star of your cookie. It gives them a unique licorice flavor. You can use extract, oil, or crushed seeds for different tastes.

Choose fresh, high-quality ingredients. Softened butter makes the dough smooth. Room-temperature eggs ensure a mix that’s just right. Baking powder helps the cookies rise, making them light and fluffy.

Pro tip: Crush your anise seeds before adding them. This boosts the flavor and makes your cookies even better.

Step-by-Step Baking Instructions

Baking with anise needs precision and care. Your journey to making delicious anise cookies begins with knowing the key steps to prepare the perfect dough.

Preparing the Cookie Dough

Making the perfect anise cookie dough is an art. Start by gathering your ingredients and getting your workspace ready. Here’s a simple way to mix your dough:

  • Cream together eggs and sugar until light and fluffy
  • Gradually add oil and vanilla extract
  • Sift dry ingredients: flour, baking powder, and anise seeds
  • Gently fold dry ingredients into wet mixture

Shaping Techniques

The magic of anise cookies is in their unique shapes. You can try different ways to shape them:

  1. Traditional crescent shapes
  2. Figure-8 designs
  3. Simple round balls
  4. Twisted rope-like formations

Pro tip: If your dough feels sticky, chill it for 20-30 minutes. This makes shaping easier.

Baking Temperature and Timing

When baking anise cookies, precision is crucial. Set your oven to 350°F and follow these guidelines:

  • Bake for 8-10 minutes
  • Look for slightly golden edges
  • Cookies should be set but not overly browned

Remember, your dough will continue to set after baking. So, avoid overbaking.

Classic Italian Anise Cookie Variations

Discover the joy of Italian anise cookie recipes. They show how versatile this flavor can be. Each type adds a special touch to the traditional anise cookies, making them a treat for all.

Traditional Italian bakeries have many classic anise cookie styles. They will make your taste buds dance:

  • Biscotti: Crisp, twice-baked cookies perfect for dunking in coffee or dessert wine
  • Pizzelle: Delicate waffle-like cookies with intricate patterns
  • Soft glazed anise cookies with a light, cake-like texture

When making your italian anise cookie recipe, think about these flavor boosts:

  1. Add lemon zest for a bright, citrusy note
  2. Incorporate almond extract for depth
  3. Experiment with vanilla to complement the anise flavor

Each variation gives a unique taste while keeping the classic anise essence. Whether you like them crisp or soft, there’s an anise cookie for everyone.

Creating the Perfect Anise Glaze

Turn your anise cookie recipe into a stunning holiday treat with a delicious glaze. The right glaze can make simple cookies into memorable holiday anise treats. They will impress your family and friends.

Making the perfect glaze needs attention to detail and a few key ingredients. Your glaze will be the crowning glory of your anise cookies. It adds both visual appeal and an extra layer of sweetness.

Glaze Ingredients and Proportions

For a classic anise cookie glaze, you’ll need:

  • 2 cups confectioners’ sugar
  • 3-4 tablespoons milk
  • 1/2 teaspoon pure anise extract
  • Optional: Pinch of salt

Application Techniques

When applying your glaze, consider these professional techniques:

  1. Allow cookies to cool completely before glazing
  2. Use a pastry brush or small offset spatula
  3. Dip cookies for full coverage
  4. Let excess glaze drip off

Decorative Finishing Touches

Make your holiday anise treats stand out with creative decorations. Sprinkle colored sugars, edible glitter, or finely chopped nuts immediately after glazing. The glaze takes about 30 minutes to set fully, giving you ample time to add decorative elements.

Pro tip: For a professional look, let the glaze set completely before storing your anise cookies. These delightful treats can be kept in an airtight container at room temperature for up to one week. This ensures maximum freshness and flavor.

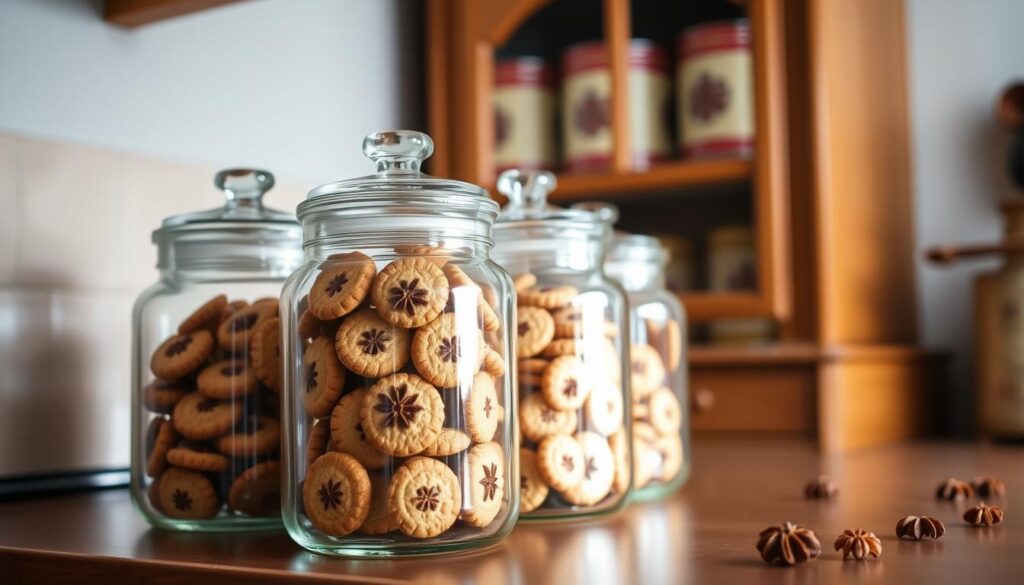
Storage Tips and Shelf Life

Anise Cookie Storage Tips

Keeping your anise cookies fresh is key. They can stay delicious with the right storage. Knowing how to store them ensures you enjoy them for a longer time.

Here are the must-know tips for storing your anise cookies:

  • Store cookies in an airtight container at room temperature
  • Keep cookies away from direct sunlight and heat sources
  • Place a piece of bread in the container to maintain moisture
  • Separate layers with parchment paper to prevent sticking

Fresh anise cookies can last 3-5 days if stored right. Freezing is a great way to keep them longer. Wrap each cookie in plastic wrap and then in a freezer-safe container. This way, they stay good for up to 3 months.

Freezing the dough is also a good idea. Wrap it in plastic wrap and put it in a freezer bag. Let it thaw in the fridge overnight before baking. This keeps your cookies tasting as fresh as the day you baked them.

  • Refrigerated cookies last up to 1 week
  • Frozen cookies remain fresh for 3 months
  • Frozen dough can be stored for up to 2 months

Pro tip: Always let your cookies cool completely before storing. This prevents moisture buildup and keeps them from getting soggy. Your anise cookies deserve the best care!

Enhancing Your Anise Cookie Recipe with Modern Twists

Baking with anise opens up a world of creativity for cooks. You can make your classic anise cookie recipe better with new techniques. These changes meet today’s dietary needs and taste preferences.

Modern bakers are finding new ways to make anise cookies. They look for healthier options or unique flavors. These updates can make your baking exciting again.

Alternative Flour Options

  • Whole wheat flour for added nutrition
  • Gluten-free flour blends for sensitive diets
  • Almond flour for a nutty undertone
  • Coconut flour for a subtle tropical hint

Exciting Flavor Combinations

Try new flavor pairs to make your anise cookies stand out. These combinations add depth to the classic taste:

  • Chocolate-Anise: Rich dark chocolate with a hint of anise
  • Citrus-Anise: Bright orange or lemon zest for a refreshing twist
  • Lavender-Anise: Delicate floral notes that enhance the cookie’s complexity

Dietary Adaptations

Make your anise cookies fit different diets without losing flavor:

  • Vegan alternatives using plant-based butter and egg substitutes
  • Gluten-free versions with specialized flour blends
  • Low-sugar options using natural sweeteners
  • Keto-friendly adaptations with almond flour and alternative sweeteners

With these modern changes, your anise cookie recipe becomes a treat for everyone. It suits various tastes and dietary needs.

Troubleshooting Common Baking Issues

Anise Cookie Baking Troubleshooting

Traditional anise cookie baking can be tricky. But knowing common challenges helps you make perfect treats every time. Bakers often face specific issues that can affect the texture and flavor of their cookies.

Here are some key strategies for solving these problems:

  • Spreading Cookies: If your cookies spread too much, your butter might be too soft. Chill the dough for 30 minutes before baking to prevent excessive spreading.
  • Tough Texture: Overmixing can increase gluten development by up to 50%, resulting in hard cookies. Mix ingredients just until combined.
  • Uneven Baking: Incorrect log size can cause up to 25% of cookies to be undercooked or overcooked. Aim for uniform log dimensions.

Temperature control is key in traditional anise cookie baking. Using an oven thermometer can reduce baking errors by 70%. Always preheat your oven and monitor baking times carefully.

Ingredient precision is important. Incorrect wet ingredient proportions can lead to a 30% chance of producing dry or soggy cookies. Measure ingredients carefully and follow the recipe closely.

  • Use room temperature ingredients
  • Chill dough before baking
  • Check oven temperature
  • Allow cookies to cool completely

By understanding these common challenges, you’ll become a master of anise flavored cookies. You’ll create delicious treats that impress every time.

Conclusion

Your journey through anise cookies has shown you a world of flavors and traditions. These holiday treats connect us to our baking heritage, filling our kitchens with warmth and nostalgia. Whether you’re trying a Spanish recipe or perfecting your family’s favorite, these cookies offer more than sweetness.

Anise cookies let you play with flavors and baking methods. You’ve seen how a simple cookie can become a highlight of your holidays. The five flavor variations we talked about are just the beginning of your baking adventures.

Baking anise cookies is about making memories, sharing traditions, and spreading joy. You now know how to substitute ingredients, improve your baking, and mix flavors. This knowledge will help you make the perfect anise cookies every time.

Let the magic of anise cookies inspire you in the kitchen. Whether for a special event or just for fun, these treats will delight your senses and warm your heart.

Tagged : / / / /

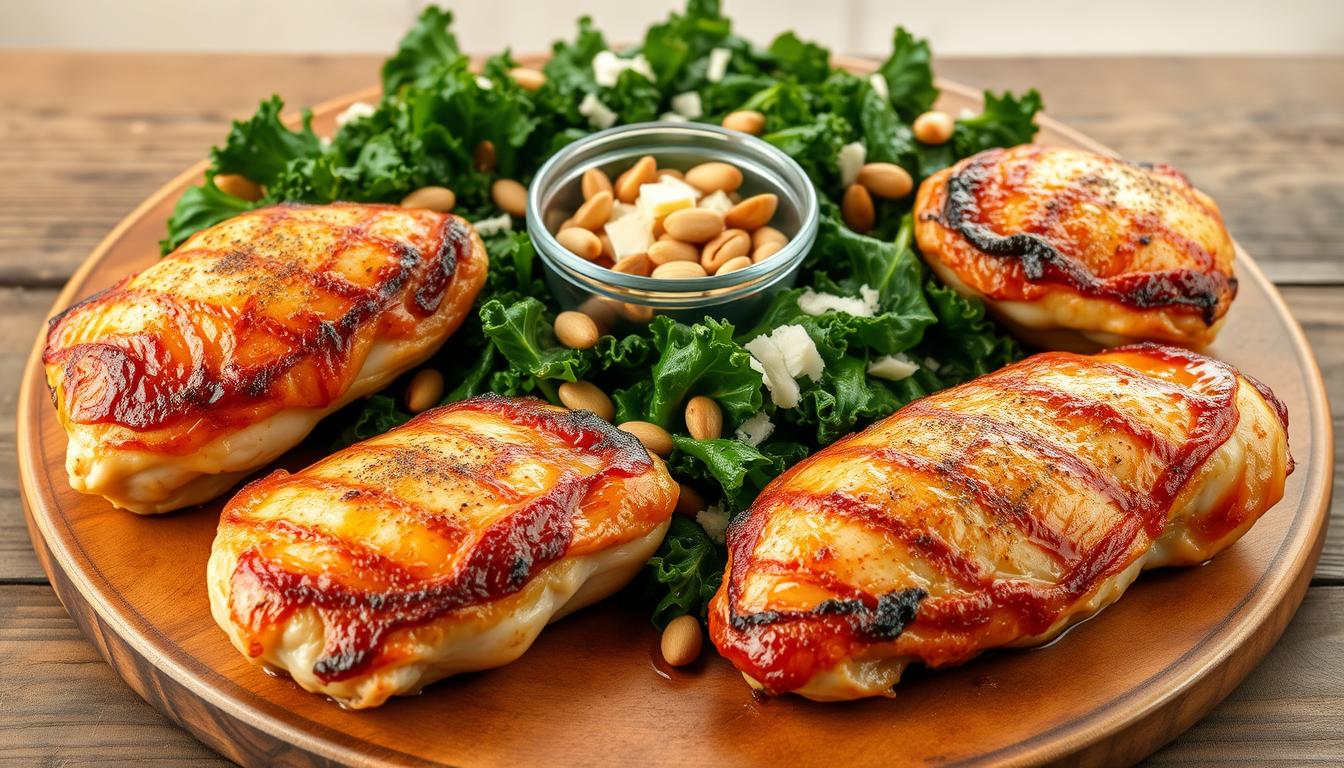
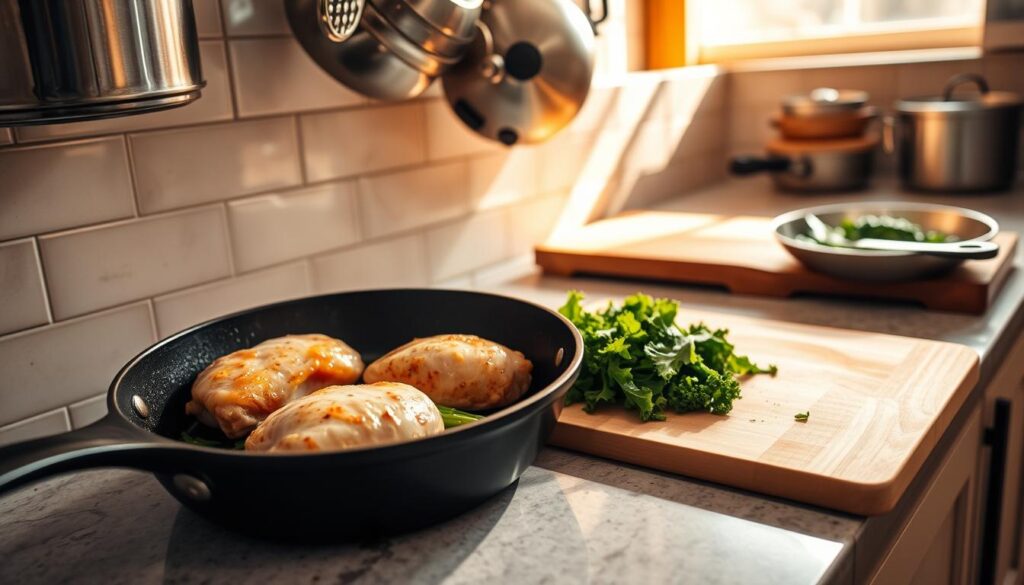
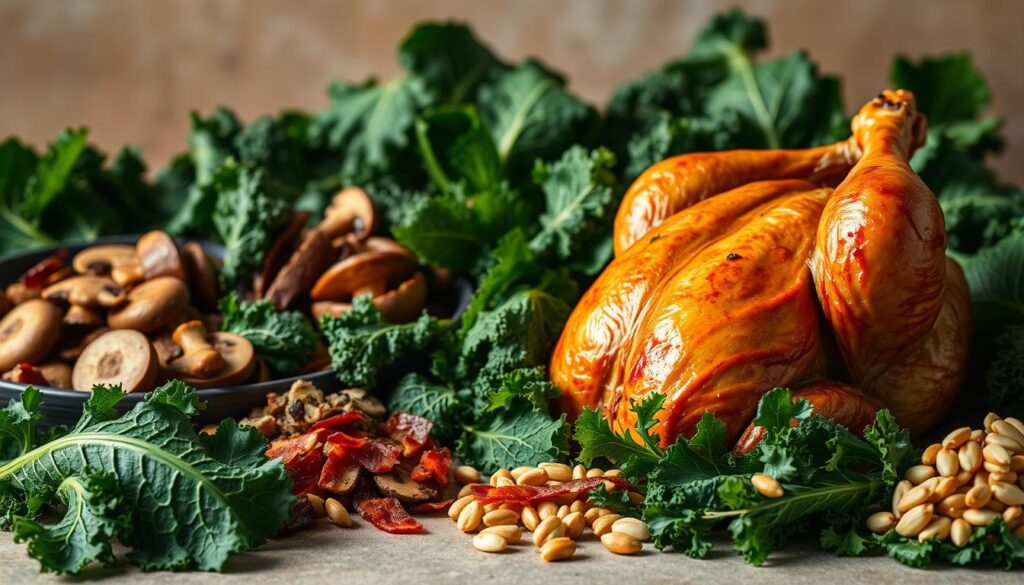
Chicken and Kale Recipe: 3 Easy Steps to a Tasty Meal

Every home cook faces the challenge of making a quick, healthy meal without losing flavor. I found this chicken and kale recipe during a busy week. It was perfect for a fast, tasty dish.

Picture this: golden chicken in a fresh kale sauce, ready in minutes. This recipe turns simple ingredients into a special meal. It’s great for anyone, whether you’re busy or love cooking.

Making tasty meals doesn’t have to be hard. This chicken and kale recipe makes a healthy dinner that looks fancy but is easy to make at home.

Key Takeaways

  • Discover a quick and nutritious chicken and kale recipe
  • Learn how to prepare a restaurant-quality meal at home
  • Enjoy a balanced dish packed with protein and leafy greens
  • Master a versatile recipe that takes just 50 minutes total
  • Create a meal with impressive nutritional value

The Perfect Blend of Protein and Leafy Greens

Chicken and kale together make a meal that’s full of nutrients. It’s a great mix of protein and greens, perfect for those who care about their health.

Benefits of Combining Chicken and Kale

When you eat chicken and kale together, you get lots of good stuff. Chicken is good for building and fixing muscles. Kale is packed with vitamins and minerals.

  • High protein content: 41g per serving
  • Low carbohydrate profile: Only 12% of calories
  • Rich in essential nutrients like Vitamin A and Vitamin C

Essential Nutrients in This Power-Packed Meal

This chicken and kale dish is full of good stuff. It has 398 calories and lots of nutrients. It’s a great way to feed your body well.

  • Vitamin A: 5248 IU
  • Vitamin C: 12 milligrams
  • Potassium: 505 milligrams
  • Fiber: 5 grams

Why This Recipe Works for Clean Eating

Clean eating means choosing foods that are good for you. This chicken and kale recipe is all about that. It uses whole foods with lots of nutrients and few additives.

By picking leafy greens and lean proteins, you make a meal that’s good for you. It tastes great too.

Required Ingredients and Kitchen Tools

Starting with the right ingredients and tools is key to quick dinners. This chicken and kale recipe is simple and fun to make. It requires a few important items for meal prep.

Essential Ingredients

  • 1 lb boneless, skinless chicken thighs
  • 1 large head of curly kale, torn into bite-sized pieces
  • 2 teaspoons olive oil for cooking
  • 1 large shallot, minced
  • 1 teaspoon cumin
  • 1 teaspoon turmeric
  • 1 cup brown rice
  • Juice and zest of 1 lemon
  • 2 cups low sodium chicken stock
  • 1 cup 0% plain Greek yogurt (for serving)

These ingredients make meal prep easy and healthy. Pro tip: Opt for organic to boost nutrition.

Kitchen Tools You’ll Need

  1. Large skillet or one-pot cooking vessel
  2. Sharp cutting board
  3. Chef’s knife
  4. Measuring cups and spoons
  5. Wooden spoon or spatula

Having the right tools makes quick dinners a breeze. With these ingredients and tools, you’re set to make a tasty, healthy meal fast.

Preparing Your Chicken and Kale Recipe

Starting with easy recipes means careful preparation. Your chicken and kale dish needs planning for great taste and nutrition. Follow these steps to make simple ingredients into a tasty meal.

Proper Chicken Selection Tips

Choosing the right chicken is key. Pick 3 chicken breasts to split lengthwise for even cooking. Look for these qualities:

  • Fresh, pinkish color without discoloration
  • Firm texture with no excess moisture
  • Organic or free-range options for better flavor

Kale Preparation Techniques

Preparing kale is important. You’ll need 2 bunches of fresh flat-leaf kale. Here’s how to prepare it:

  1. Wash kale thoroughly under cold water
  2. Remove tough stems completely
  3. Finely chop leaves into uniform pieces

Seasoning Guidelines

Your seasoning blend will make the dish taste amazing. Use 5 essential ingredients for a basic spice rub:

  • Salt
  • Garlic powder
  • Onion powder
  • Black pepper
  • Smoked paprika

Make sure to season evenly. Gently massage the seasoning into both the chicken and kale for the best flavor.

Mastering the Cooking Process

Cooking Chicken and Kale Quick Dinners

Making quick dinners is easy. Your chicken and kale recipe needs the right cooking techniques for great taste. It’s all about controlling temperature and timing for perfect chicken.

Begin by getting your chicken ready with these steps:

  • Select chicken breasts or thighs at room temperature
  • Pat chicken dry with paper towels to ensure crispy exterior
  • Season generously with salt and pepper

For juicy chicken, follow these cooking tips:

  1. Heat olive oil in a skillet over medium-high heat
  2. Cook chicken for 5-6 minutes per side
  3. Aim for an internal temperature of 165°F
  4. Let chicken rest for 5 minutes after cooking

Pro tip: Use a meat thermometer to check doneness accurately. Chicken continues cooking after removal from heat, so remove it at 155-160°F.

When cooking kale, sauté for about 5 minutes until tender. This method keeps nutrients and adds a nice texture that goes well with chicken.

Creating the Perfect Coconut Kale Sauce

Making a tasty coconut kale sauce turns your meals into a fun journey. It mixes healthy ingredients to make your chicken dish richer and more flavorful. The goal is to mix textures and tastes for a memorable meal.

  • 1 can full-fat coconut milk
  • 2-3 tablespoons curry paste
  • Finely chopped kale
  • Shallots
  • Soy sauce

Sauce Consistency Tips

Getting the right sauce consistency takes time and skill. Begin by simmering your mix for 5-10 minutes. This lets the sauce thicken on its own. Stir often to avoid burning and mix flavors well.

Flavor Enhancement Techniques

Here are some tips to boost your sauce’s flavor:

  1. Toast your curry paste a bit before adding liquid to bring out its aroma
  2. Choose fresh kale for the best nutrition
  3. Season slowly, tasting as you go
  4. Let the sauce sit for a few minutes after cooking to blend flavors

Your coconut kale sauce will not only taste amazing but also be packed with nutrients. It’s a great choice for those who want healthy, tasty meals.

Recipe Variations and Substitutions

Chicken and Kale Recipe Variations

Trying out different proteins and veggies can make your chicken and kale dish more versatile. Clean eating is about being flexible and staying healthy.

Want to cut down on carbs? Here are some great swaps:

  • Replace chicken with shrimp for a seafood twist
  • Swap chicken for turkey to reduce fat content
  • Use meatballs for a hearty alternative

Vegetable swaps can bring new flavors and textures to your meal:

  • Substitute kale with spinach for a milder taste
  • Add bell peppers for extra crunch and color
  • Mix in Swiss chard for a nutrient-packed green

These changes keep your meal healthy while letting you tailor it to your liking. Whether you’re on a low-carb diet or just want to try new things, these options are tasty.

Always aim for a balanced and nutritious meal. Pick top-notch proteins and fresh veggies for the best results.

Serving Suggestions and Pairings

Make your chicken and kale dish more exciting with these serving ideas. Healthy meals can be fun and tasty. Meal prep doesn’t have to be dull.

Complementary Side Dishes

Enhance your meal with these great pairings. They match the flavors of chicken and kale perfectly:

  • Quinoa pilaf with roasted vegetables
  • Cauliflower rice for a low-carb option
  • Roasted sweet potato wedges
  • Lemon-garlic brown rice

Plating Presentation Tips

Make your meal look as good as it tastes with these tips:

  1. Use a white rectangular plate to make colors pop
  2. Place chicken slightly off-center
  3. Drizzle coconut kale sauce in an artistic pattern
  4. Garnish with fresh cilantro or chili crisp

For those who love meal prep, this recipe is perfect. You can portion it out in airtight containers. It’s great for lunch or dinner and stays fresh for up to 3 days.

Nutritional bonus: Each serving has 22g of protein and only 562 calories. It’s perfect for those who want to eat healthy without sacrificing taste.

Storage and Meal Prep Tips

Your chicken and kale recipe is great for meal prep. It helps you make quick dinners all week. Preparing it ahead of time saves you from daily cooking stress and saves time during busy weeks. Glass containers are best for storing your meals, keeping them fresh and organized.

Refrigeration is crucial when storing your chicken and kale recipe. Your meals can stay fresh for up to 5 days in the fridge. This makes it a top choice for easy meal prep. You can also freeze portions without sauce for up to 3 months, offering flexibility for future meals.

Reheating your meal prep is quick and easy. Most servings only need 1-2 minutes in the microwave. This ensures you can enjoy a hot, nutritious meal with little effort. The kale stays fresh, making this recipe perfect for tasty and healthy quick dinners.

To make meal prep even more efficient, try batch cooking this recipe. It takes just 45 minutes to prepare, making multiple servings that are nutritious and save time. Use good storage containers to keep your meals fresh and appealing.

Tagged : / / / /

How to Make Cream Cheese Appetizers Fast ?

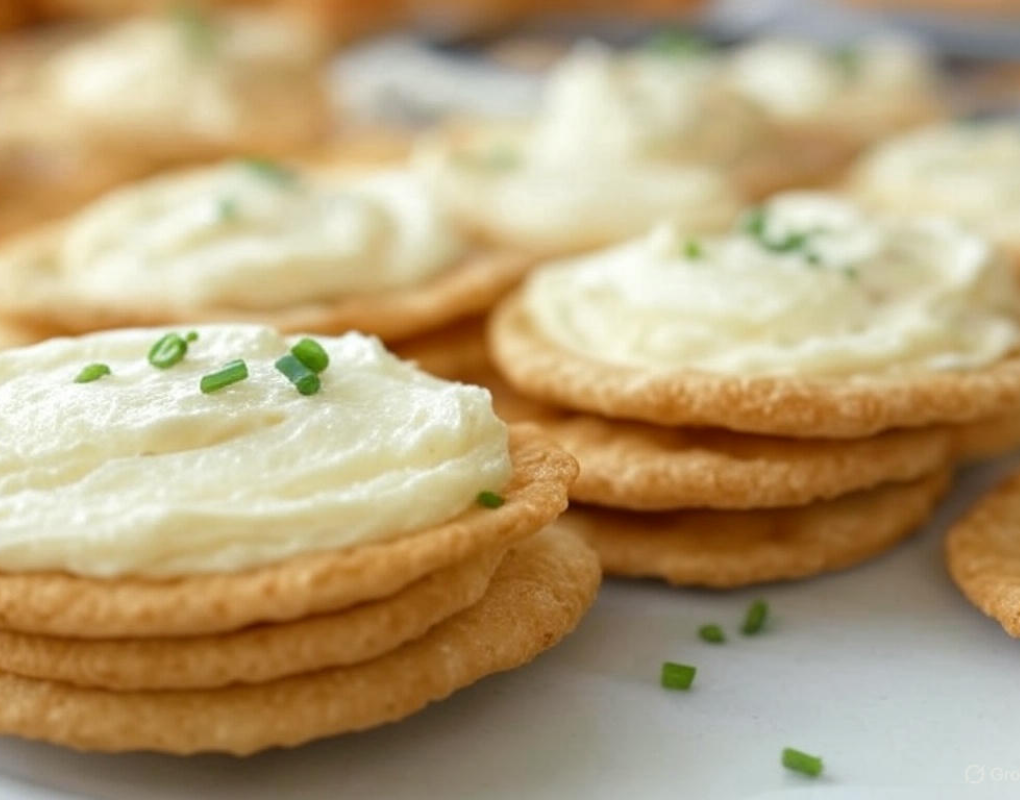
Hey, friends! Picture this: you’ve got guests coming over in an hour, and your snack game is nowhere near ready. That’s when I turn to cream cheese appetizers—my secret weapon for quick, crowd-pleasing bites that save the day. I remember the first time I whipped these up for a last-minute game night; I was scrambling, but the creamy goodness won everyone over (even after I nearly forgot the crackers!). Whether you’re hosting a party or just craving something savory, these Savory Cream Cheese Appetizers are a lifesaver. They’re fast, flavorful, and oh-so-easy—perfect for busy nights when you still want to impress. Ready to dive in? Let’s get those appetizers rolling!

Ingredients List

Here’s what you’ll need to make these tasty bites:

  • 8 oz cream cheese (softened)
  • 1/4 cup sour cream
  • 1/2 cup shredded cheddar cheese
  • 2 tbsp chopped fresh chives
  • 1 tsp garlic powder
  • 1/2 tsp smoked paprika
  • 12 Triscuit crackers (original or your favorite flavor)
  • 1/4 cup diced red bell pepper
  • 2 tbsp olive oil
  • Salt and pepper to taste

Step-by-Step Instructions

  1. Preheat the oven to 375°F (190°C)—we’re baking these babies to golden perfection!
  2. Mix the base: In a bowl, combine softened cream cheese, sour cream, cheddar, garlic powder, and smoked paprika until smooth.
  3. Add some flair: Stir in the chives and diced bell pepper for a pop of color and flavor.
  4. Spread it out: Spoon the mixture onto Triscuit crackers, creating an even layer—think mini flavor canvases!
  5. Bake to bubbly: Place the topped crackers on a baking sheet, drizzle with olive oil, and bake for 20-25 minutes.
  6. Cool and season: Let them cool for 5 minutes, then sprinkle with salt and pepper to taste.
  7. Serve it up: Arrange your Triscuit Appetizers Cream Cheese on a platter and watch them disappear!

Cooking Tips and Variations

cream-cheese-appetizers

Want to level up your cream cheese appetizers? Here are a few tricks I’ve learned:

  • Switch the cheese: Swap cheddar for mozzarella if you’re craving extra stretchy goodness.
  • Spice it up: Add a pinch of cayenne for a kick—perfect for a Philly cheesesteak pasta with chicken vibe if you’re feeling adventurous!
  • Make it meaty: Top with crumbled bacon or prosciutto for a heartier bite.
  • Cracker swap: No Triscuits? Use bagel chips or pita crisps—they work just as well.

Pro tip: Don’t overbake—I burned my first batch trying to multitask (oops!). Keep an eye on them for that perfect golden edge.

Nutritional Information

Here’s a quick peek at what you’re serving:

  • Calories: 220
  • Protein: 5g
  • Carbs: 12g
  • Fat: 18g

It’s indulgent but worth every creamy bite!

FAQs

Can I make cream cheese appetizers ahead of time?
Yes! Prep the mixture a day early, store it in the fridge, and spread it on crackers just before baking.

What crackers work best?
Triscuits are my go-to for their sturdy crunch, but any firm cracker or chip will hold up to the creamy topping.

Can I freeze these?
The baked appetizers don’t freeze well (they get soggy), but the cream cheese mix freezes fine for up to a month.

How do I make them less rich?
Cut the sour cream in half or use a light cream cheese—still tasty, just a bit lighter!

Got a gluten-free option?
Swap Triscuits for gluten-free crackers—easy peasy!

Conclusion and Call-to-Action

There you have it—cream cheese appetizers that come together fast and taste like you spent hours in the kitchen. These have become a weeknight staple at my house, especially when I need a quick win for hungry friends. The creamy, savory combo is pure comfort food magic. What do you think—ready to give them a try? Drop a comment below with your favorite twist, or share this with your foodie crew! Oh, and if you love easy snacks, check out my Chicken Sliders Recipe for another crowd-pleaser. Let’s keep the tasty vibes going!

Recipe Card

How to Make Cream Cheese Appetizers Fast
Prep Time: 15 minutes
Cook Time: 25 minutes
Total Time: 40 minutes
Servings: 6

Ingredients:

  • 8 oz cream cheese (softened)
  • 1/4 cup sour cream
  • 1/2 cup shredded cheddar cheese
  • 2 tbsp chopped fresh chives
  • 1 tsp garlic powder
  • 1/2 tsp smoked paprika
  • 12 Triscuit crackers
  • 1/4 cup diced red bell pepper
  • 2 tbsp olive oil
  • Salt and pepper to taste

Instructions:

  1. Preheat oven to 375°F (190°C).
  2. Mix cream cheese, sour cream, cheddar, garlic powder, and paprika until smooth.
  3. Stir in chives and bell pepper.
  4. Spread mixture onto Triscuit crackers.
  5. Place on a baking sheet, drizzle with olive oil, and bake for 20-25 minutes.
  6. Cool for 5 minutes, season with salt and pepper, and serve.

Nutrition (per serving):

  • Calories: 220 | Protein: 5g | Carbs: 12g | Fat: 18g

Shrimp Orzo Recipe: 3 Tricks for a Quick Meal

Introduction

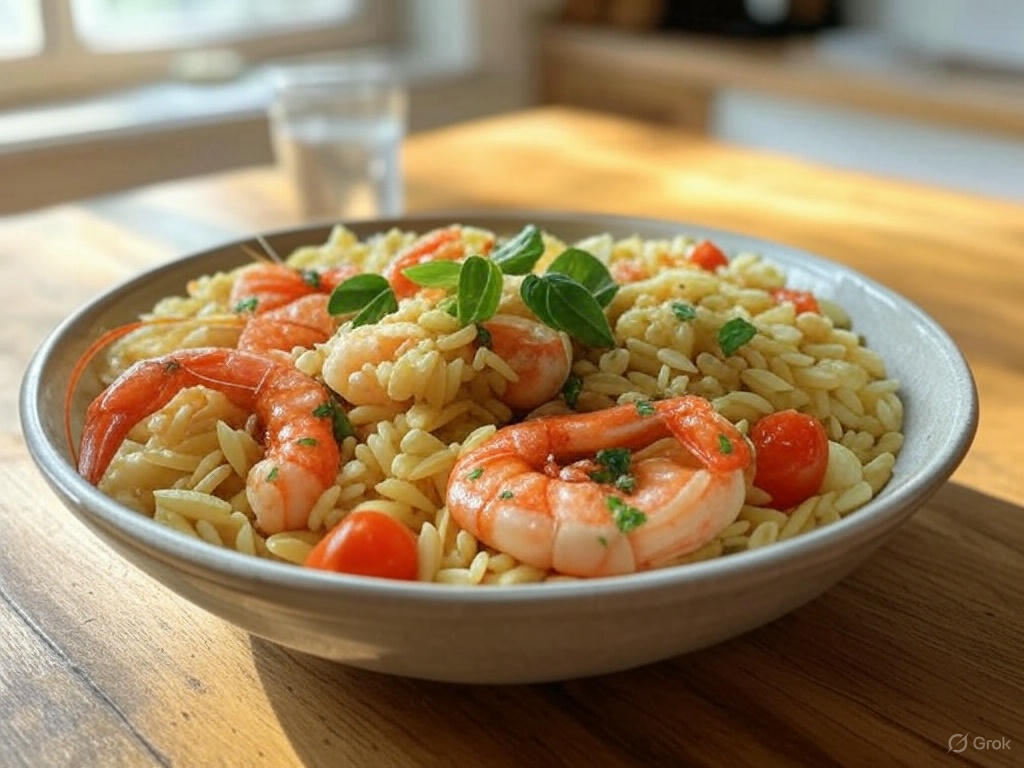
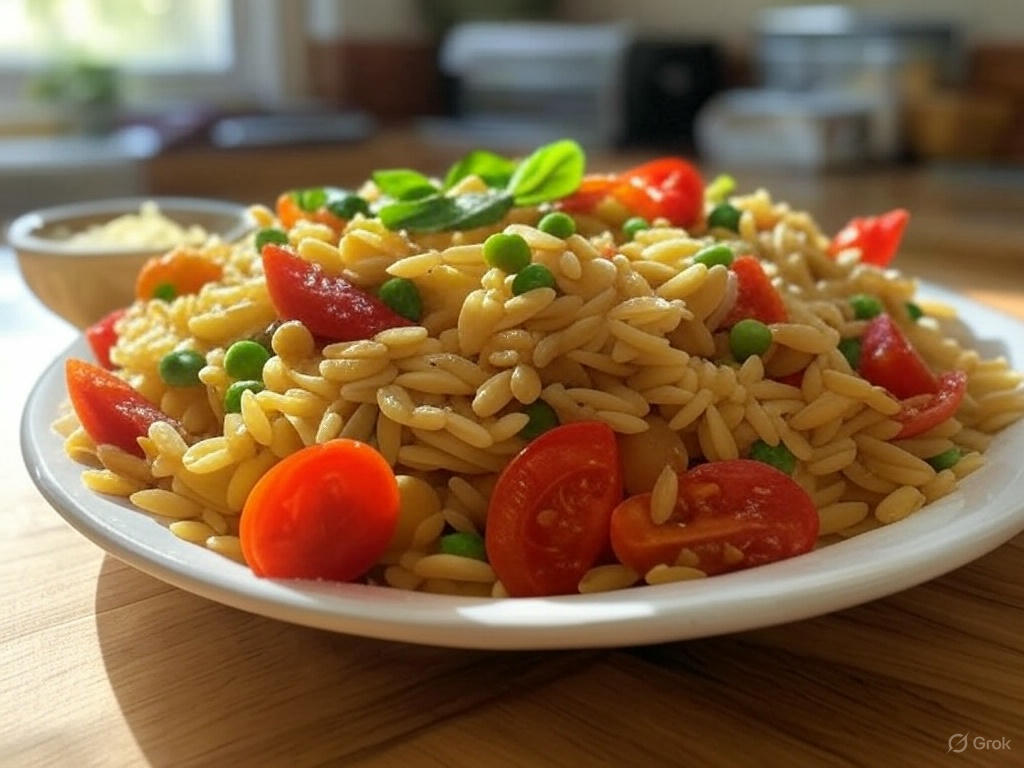
Picture this: succulent shrimp, tender orzo, and a burst of juicy, garlicky flavor all coming together in under 30 minutes. If that doesn’t scream weeknight dinner goals, I don’t know what does! This shrimp orzo recipe is the kind of dish that makes you feel like a kitchen rockstar without breaking a sweat. I first stumbled upon this gem when a friend casually mentioned her “go-to seafood fix” during a chaotic week. One bite, and I was hooked—creamy yet light, flavorful yet simple, it’s pure comfort in a bowl.

What makes this shrimp orzo recipe so special? It’s the ultimate trifecta: quick prep time, budget-friendly ingredients, and a family-friendly vibe that even picky eaters adore. Unlike my fan-favorite creamy garlic shrimp pasta on the blog, this dish swaps heavy fettuccine for light, rice-like orzo, giving it a fresh twist. Whether you’re a busy parent or just craving something deliciously easy, this recipe’s got your back. So, grab your skillet, and let’s dive into a meal that’s as fun to make as it is to eat!


What is a Shrimp Orzo Recipe?

Ever wondered what happens when shrimp and orzo walk into a kitchen together? Pure magic, that’s what! A shrimp orzo recipe is a delightful mashup of plump, juicy shrimp and orzo—a tiny, rice-shaped pasta that soaks up every ounce of flavor. Think of it as a playful cousin to risotto, but without all the stirring drama. I once served this at a potluck, and someone asked, “Is this fancy shrimp rice?” Nope, just orzo working its charm!

Why’s it called shrimp orzo? Well, it’s as straightforward as it gets—shrimp steals the spotlight, and orzo plays the supporting role. As the classic saying goes, “The way to a man’s heart is through his stomach,” and this dish proves it every time. Ready to whip up something irresistible? Let’s get cooking!


Why You’ll Love This Shrimp Orzo Recipe

This shrimp orzo recipe isn’t just another meal—it’s a game-changer. Here’s why it’ll steal your heart (and your taste buds):

  1. Quick and Delicious Highlight: The star of this dish is its speed—ready in under 30 minutes, it’s perfect for busy nights. The shrimp cooks up juicy and tender, while the orzo brings a satisfying bite that ties it all together.
  2. Cost-Saving Perks: Skip the pricey takeout! This shrimp orzo recipe uses affordable pantry staples like orzo and frozen shrimp, saving you money without skimping on flavor. One batch feeds a family for less than a restaurant appetizer.
  3. Flavorful Twists: Fresh garlic, zesty lemon, and a sprinkle of Parmesan elevate this dish to drool-worthy status. It’s light yet indulgent, with every bite bursting with seafood goodness.

Compared to my lemon shrimp linguine, this version leans on orzo’s unique texture for a fun, spoonable experience. Trust me, once you try it, you’ll be hooked. Ready to see why it’s a reader favorite? Let’s dig into the how-to!


How to Make a Shrimp Orzo Recipe

Quick Overview
This shrimp orzo recipe is your ticket to an easy, delicious, and satisfying meal. With just a handful of ingredients and three clever tricks (hello, one-pan magic!), you’ll have a dish that’s bursting with flavor and cleanup that’s a breeze. It’s seafood comfort food at its finest.

Key Ingredients

  • 1 lb large shrimp, peeled and deveined
  • 1 cup orzo pasta (uncooked)
  • 2 cups chicken broth (or vegetable broth)
  • 1 tbsp olive oil
  • 2 cloves garlic, minced
  • 1 tsp lemon zest
  • 2 tbsp lemon juice
  • 1/4 cup grated Parmesan cheese
  • Salt and pepper to taste
  • Fresh parsley, chopped (optional garnish)

Insert high-quality image of ingredients here: a colorful spread of shrimp, orzo, lemon, and garlic on a rustic table.

Step-by-Step Instructions

  1. Prep the Shrimp: Pat your shrimp dry with a paper towel and season lightly with salt and pepper. This step locks in juiciness—don’t skip it! Set aside while you heat things up.
  2. Cook the Base: In a large skillet, heat olive oil over medium heat. Add minced garlic and sauté for 30 seconds until fragrant. Toss in the orzo and stir for 1-2 minutes to toast it lightly. This trick boosts flavor!
  3. Simmer the Orzo: Pour in the chicken broth, stirring to combine. Bring it to a gentle boil, then lower the heat to a simmer. Cover and cook for 8-10 minutes, stirring occasionally, until the orzo is tender and most of the liquid is absorbed.
  4. Add the Shrimp: Nestle the shrimp into the orzo, cover, and cook for 3-4 minutes until they turn pink and opaque. Pro tip: Don’t overcook—shrimp should be juicy, not rubbery!
  5. Finish with Flavor: Stir in lemon zest, lemon juice, and Parmesan cheese. Taste and adjust seasoning with salt and pepper. The third trick? That lemony zing ties it all together.
  6. Garnish and Serve: Sprinkle with fresh parsley for a pop of color and freshness. Serve hot and watch it disappear!

What to Serve with a Shrimp Orzo Recipe

This shrimp orzo recipe shines on its own, but pairing it with the right sides takes it to the next level. Try a crisp green salad with a tangy vinaigrette to balance the richness. Crusty garlic bread is perfect for sopping up every last bit of garlicky goodness. For a lighter touch, steamed asparagus or sautéed spinach adds a veggie boost. Thirsty? A chilled glass of white wine—like a Sauvignon Blanc—or a sparkling lemon water complements the citrusy notes. Mix and match to suit your crew!


Top Tips for Perfecting Your Shrimp Orzo Recipe

Want to nail this dish every time? Here are some pro tips:

  • Use Fresh Shrimp: Frozen works fine (thaw it first!), but fresh shrimp adds an extra layer of sweetness.
  • Substitutions: No orzo? Try small pasta like ditalini or even rice in a pinch—just adjust cooking time.
  • Avoid Soggy Orzo: Don’t overcook the orzo in step 3; it should be al dente before adding shrimp.
  • Boost Flavor: Add a pinch of red pepper flakes for a subtle kick or swap Parmesan for feta for a tangy twist.
  • Time-Saver: Pre-mince garlic and zest the lemon while the skillet heats to keep things speedy.

Storing and Reheating Tips

Storage Tips
Got leftovers? Lucky you! Store your shrimp orzo recipe in an airtight container in the fridge. It stays fresh for up to 2-3 days. Avoid freezing, as the orzo can get mushy and the shrimp might lose its texture.

Reheating Instructions
For the best taste, reheat gently on the stovetop. Add a splash of broth or water to a skillet, then warm the dish over low heat, stirring until heated through (about 5 minutes). Microwave works too—cover it with a damp paper towel and heat in 30-second bursts, stirring in between. A quick squeeze of lemon before serving revives that fresh flavor.

There you have it—a shrimp orzo recipe that’s quick, budget-friendly, and packed with flavor! Whether you’re feeding a crowd or just treating yourself, this dish delivers every time. Have you tried it yet? Drop a comment below and let me know how it went—or share your own twists! Happy cooking!

Focaccia Pizza Recipe You’ll Wish You Knew Sooner

Introduction

Imagine biting into a slice of pizza that’s airy yet chewy, bursting with robust flavors, and topped with gooey cheese that stretches with every pull. That’s the magic of this focaccia pizza recipe—a dish that marries the best of fluffy focaccia bread with the irresistible charm of classic pizza. I stumbled upon this gem during a rainy weekend when my family craved something comforting yet fun. After one accidental tweak to my usual dough, we were hooked! What makes this recipe special? It’s ridiculously simple, whips up in under an hour, and brings smiles to even the pickiest eaters. Unlike my viral Garlic Knots Recipe, which leans heavy on buttery decadence, this focaccia pizza recipe keeps things light yet satisfying. Whether you’re a busy parent or a pizza enthusiast, this dish promises to elevate your kitchen game. Ready to dig in? Let’s make pizza night unforgettable!

What is Focaccia Pizza Recipe?

So, what’s this focaccia pizza recipe all about? Picture this: focaccia’s soft, olive oil-kissed dough meets pizza’s bold toppings—pure genius, right? I once jokingly called it “pizza’s chill cousin” while chatting with a friend, and it stuck! It’s a playful mashup born from Italy’s love for bread and sauce. Ever wonder why some dishes just work? This one’s proof that simplicity can steal the show. As the saying goes, “The way to a man’s heart is through his stomach”—and this recipe’s a shortcut to everyone’s heart! Whether you’re a newbie or a kitchen pro, you’ll nail it. Go ahead, give it a whirl—you won’t regret it!

Why You’ll Love This Focaccia Pizza Recipe

focaccia pizza recipe

This focaccia pizza recipe has so much to adore, but here are three reasons it’ll win you over:

  • The Main Highlight: That dough! It’s pillowy yet crisp, thanks to a quick rise and a drizzle of olive oil. One bite, and you’ll wonder why you ever settled for store-bought crusts.
  • Cost-Saving Perks: Skip the takeout bill! With pantry staples like flour, yeast, and a few toppings, you’ll craft a pizza that rivals your favorite pizzeria for pennies per slice.
  • Flavorful Toppings: Think juicy tomatoes, fragrant basil, and melty mozzarella—or whatever you fancy! The beauty lies in its versatility, making every batch a flavor adventure.

Compared to my Classic Margherita Pizza, this version skips the fuss of thin-crust perfection for a heartier, no-stress vibe. Ready to taste the difference? Let’s get cooking!

How to Make Focaccia Pizza Recipe

Quick Overview

This focaccia pizza recipe is your ticket to an easy, delicious dinner that hits all the right spots. With minimal kneading and a speedy prep, it’s perfect for weeknights or impromptu gatherings. The result? A golden, satisfying pizza that’ll have everyone asking for seconds.

Key Ingredients
  • 3 ½ cups all-purpose flour
  • 1 ¼ cups warm water (about 110°F)
  • 2 tsp active dry yeast
  • 2 tbsp olive oil (plus extra for drizzling)
  • 1 tsp salt
  • 1 tsp sugar
  • ½ cup pizza sauce
  • 1 ½ cups shredded mozzarella cheese
  • Toppings: pepperoni, cherry tomatoes, fresh basil, or your favorites

(Insert high-quality image of ingredients here)

Step-by-Step Instructions
  1. Activate the Yeast: In a small bowl, mix warm water, sugar, and yeast. Let it sit for 5-10 minutes until foamy. This step wakes up the yeast for that fluffy dough magic!
  2. Make the Dough: In a large bowl, combine flour and salt. Pour in the yeast mixture and 2 tbsp olive oil. Stir until a shaggy dough forms—don’t worry if it’s sticky!
  3. Knead Lightly: Turn the dough onto a floured surface and knead for 3-5 minutes until smooth. Beginners, go slow—it’s forgiving!
  4. First Rise: Place dough in an oiled bowl, cover with a damp towel, and let it rise in a warm spot for 30 minutes. It’ll puff up beautifully.
  5. Shape the Base: Preheat your oven to 425°F. Grease a baking sheet with olive oil, then press the dough evenly across it, about ½-inch thick. Use your fingers to dimple the surface—those nooks hold flavor!
  6. Add Toppings: Spread pizza sauce over the dough, sprinkle with mozzarella, and layer on your chosen toppings. Drizzle with a little olive oil for that golden finish.
  7. Bake: Pop it in the oven for 20-25 minutes until the crust is golden and cheese is bubbly. Let it cool for 5 minutes before slicing—trust me, it’s worth the wait!

What to Serve Focaccia Pizza Recipe With

This focaccia pizza recipe shines solo, but pairing it ups the fun! Serve it with a crisp Caesar salad for a fresh crunch or garlic breadsticks for extra indulgence. A chilled glass of sparkling water with lemon keeps it light, while a fruity red wine like Chianti complements the tomato and cheese. Hosting a crowd? Add a platter of antipasto—olives, cured meats, and marinated veggies—for a full Italian vibe.

Top Tips for Perfecting Focaccia Pizza Recipe

  • Dimple Like a Pro: Pressing those dents into the dough isn’t just fun—it helps the olive oil soak in for a crispier crust.
  • Substitutions: No mozzarella? Try provolone or cheddar. Out of yeast? Instant works too—just skip the activation step and mix it with the flour.
  • Avoid Soggy Slices: Go easy on the sauce (½ cup is plenty) and pre-cook wet toppings like mushrooms to keep the base light and airy.
  • Boost Flavor: Sprinkle dried oregano or garlic powder over the dough before baking for an extra Italian kick.

Storing and Reheating Tips

  • Storage: Got leftovers? Store your focaccia pizza recipe in an airtight container in the fridge—it stays fresh for up to 3 days. For longer, wrap slices in foil and freeze for up to a month.
  • Reheating: Pop refrigerated slices in a 375°F oven for 8-10 minutes to revive that crispy crust and melty cheese. From frozen, bake at 400°F for 12-15 minutes. Microwaving works in a pinch (1-2 minutes), but the crust may soften—your call!

There you have it—a focaccia pizza recipe that’s equal parts easy, affordable, and downright delicious. Whether you’re feeding a hungry family or treating yourself, this dish delivers every time. So, grab your apron, preheat that oven, and let’s make pizza night one to remember. What toppings will you try first? Drop a comment below—I’d love to hear! Happy cooking!

How to Make a Margarita Pitcher Recipe for 8 Guests

Introduction

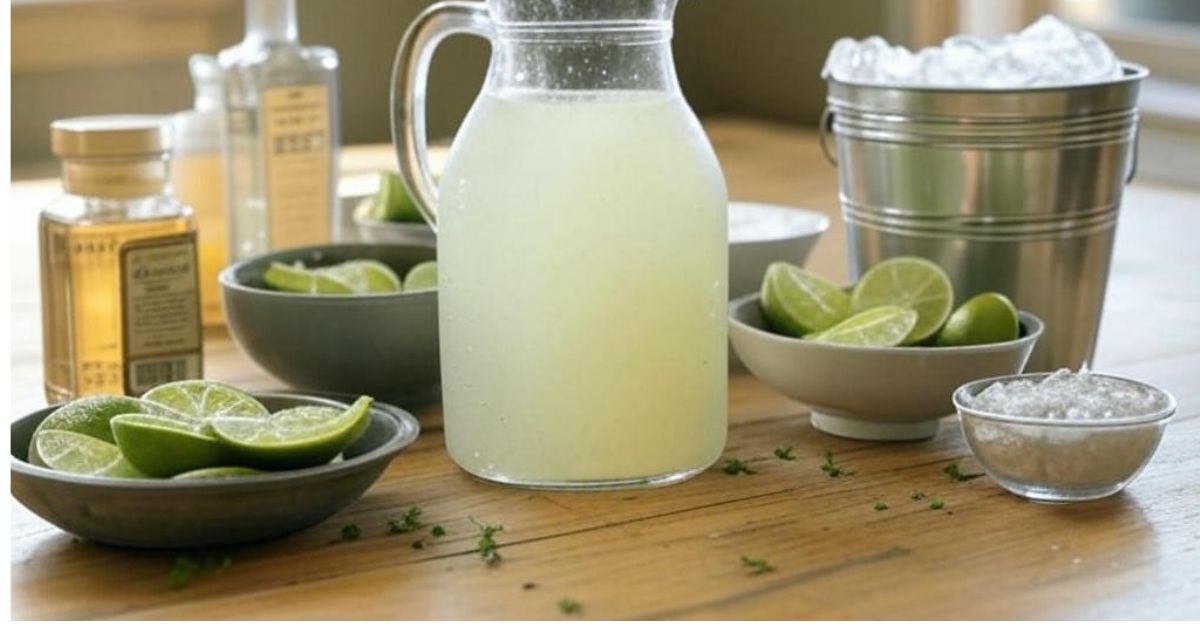
Picture this: a warm evening, friends gathered around, and the zesty, refreshing taste of a perfectly blended margarita in everyone’s hand. That’s the magic of a margarita pitcher recipe! This crowd-pleasing drink is tangy, bold, and oh-so-satisfying—ideal for any gathering. I’ll never forget the first time I made this for a backyard BBQ; the pitcher was empty in minutes, and my guests begged for the recipe. What makes this margarita pitcher recipe so special? It’s incredibly simple, whips up in under 10 minutes, and delivers that classic tequila-lime punch everyone loves. Plus, it’s family-friendly—just swap the booze for extra juice, and the kids can join the fun! Compared to my popular Tequila Sunrise for a Crowd, this margarita version steals the show with its vibrant flavor and easy prep. Whether it’s a casual hangout or a festive celebration, this recipe promises smiles all around. Ready to shake up your next party? Let’s dive in with a recipe that’s as fun to make as it is to sip!


What is a Margarita Pitcher Recipe?

So, what’s a margarita pitcher recipe anyway? Isn’t it just a margarita… but bigger? Well, yes—and no! It’s your ticket to serving up that iconic tequila-lime goodness without playing bartender all night. Imagine this: instead of shaking individual drinks, you mix one big batch and let the party flow. I once overheard a friend say, “The way to a man’s heart is through his stomach,” but I’d argue a pitcher of margaritas gets you there faster! This recipe takes the classic cocktail—born in Mexico, loved worldwide—and scales it up for eight thirsty guests. It’s playful, it’s practical, and it’s downright delicious. Ready to impress your crew with minimal effort? Let’s get mixing!


Why You’ll Love This Margarita Pitcher Recipe

This margarita pitcher recipe is a game-changer, and here’s why:

  • It’s a Party Star: One batch serves eight, making it the ultimate stress-free hosting hack. No more juggling cocktail shakers while your guests wait!
  • Budget-Friendly Bliss: Skip the pricey bar tab. With a few affordable ingredients like tequila, limes, and triple sec, you’ll craft a margarita pitcher recipe that rivals any restaurant’s—at a fraction of the cost.
  • Flavor That Pops: Fresh lime juice, a hint of sweetness, and optional salty rims bring that irresistible margarita vibe. Add a twist with fruit like strawberries or mango for extra wow!

Love my Sangria Pitcher Recipe? This margarita version swaps wine for tequila and ups the citrusy zing. Trust me, once you try this, you’ll be hooked. Ready to taste the magic? Let’s make it happen!


How to Make a Margarita Pitcher Recipe

Quick Overview

This margarita pitcher recipe is a breeze to whip up, bursting with fresh flavors, and guaranteed to satisfy a crowd. With just a handful of ingredients and a few minutes, you’ll have a refreshing drink that’s perfect for sipping and sharing.

Key Ingredients
  • 2 cups tequila (blanco or reposado)
  • 1 cup triple sec
  • 1 ½ cups fresh lime juice (about 10-12 limes)
  • ½ cup simple syrup (adjust to taste)
  • 4 cups ice
  • Lime wedges (for garnish)
  • Coarse salt (optional, for rimming)
  • Optional: fresh fruit like strawberries or mango for a twist

Insert high-quality image of ingredients here, captioned: “Everything you need for a perfect margarita pitcher recipe!”

Step-by-Step Instructions
  1. Prep Your Pitcher: Grab a large pitcher that holds at least 2 quarts. You’ll want plenty of room for mixing and ice.
  2. Juice the Limes: Squeeze those limes until you’ve got 1 ½ cups of fresh juice. Pro tip: Roll them on the counter first to get every drop!
  3. Mix the Base: Pour tequila, triple sec, lime juice, and simple syrup into the pitcher. Stir well with a long spoon until everything’s blended.
  4. Taste Test: Dip a spoon in—too tart? Add more simple syrup. Too sweet? A splash of lime juice balances it out. Make it yours!
  5. Add Ice: Toss in 4 cups of ice and stir again. The chill is key to that refreshing margarita vibe.
  6. Rim the Glasses (Optional): Run a lime wedge around each glass rim, then dip in coarse salt for that classic touch.
  7. Serve It Up: Pour into glasses, garnish with lime wedges, and watch your guests light up with the first sip!

What to Serve with a Margarita Pitcher Recipe

This margarita pitcher recipe pairs beautifully with fiesta favorites. Serve it alongside crispy tortilla chips and guacamole for a salty crunch, or go all out with chicken tacos topped with salsa. Craving something sweet? A plate of churros dipped in chocolate sauce complements the citrusy tang. For a lighter option, try a fresh mango salsa—it echoes any fruit twists you’ve added. Whatever you choose, this drink brings the party to life!


Top Tips for Perfecting Your Margarita Pitcher Recipe

  • Fresh is Best: Use freshly squeezed lime juice—bottled stuff just doesn’t compare.
  • Substitutions: No triple sec? Swap in Cointreau or orange juice for a twist. For a non-alcoholic version, use sparkling water and extra juice.
  • Avoid Over-Icing: Add ice just before serving to prevent dilution. If it sits too long, the flavor weakens.
  • Customize It: Blend in mashed strawberries or mango puree for a fruity kick—about 1 cup does the trick!
  • Chill Ahead: Mix the base (minus ice) earlier and refrigerate to save time when guests arrive.

Storing and Reheating Tips

  • Storing Leftovers: Pour any extra margarita pitcher recipe into an airtight container (no ice) and refrigerate. It stays fresh for up to 2 days.
  • Freezer Option: Freeze the mix in ice cube trays for up to a month. Blend the cubes later for a slushy treat!
  • Reheating (Refreshing): No reheating here—just stir well, add fresh ice, and serve chilled. If it’s been sitting, a splash of lime juice revives the zing.

Recipe Schema Markup

Recipe Name: Margarita Pitcher Recipe

  • Preparation Time: PT10M (10 minutes)
  • Cooking Time: PT0M (0 minutes)
  • Total Time: PT10M (10 minutes)
  • Type of Recipe: Beverage
  • Cuisine: Mexican
  • Keywords: margarita pitcher recipe, summer, party, cocktail, tequila
  • Recipe Yield: 8 servings
  • Calories: 220 calories per serving

Recipe Ingredients:

  • 2 cups tequila
  • 1 cup triple sec
  • 1 ½ cups fresh lime juice
  • ½ cup simple syrup
  • 4 cups ice
  • Lime wedges
  • Coarse salt (optional)

Pros:

  • Quick and easy to prepare
  • Perfect for group gatherings
  • Customizable with fruit flavors

Cons:

  • Can dilute if ice melts too long
  • Requires fresh limes for best taste

Recipe Instructions:

  1. Combine tequila, triple sec, lime juice, and simple syrup in a pitcher.
  2. Stir until well mixed.
  3. Add ice and stir again.
  4. Optional: Rim glasses with salt.
  5. Pour into glasses and garnish with lime wedges.

There you have it—a margarita pitcher recipe that’s sure to make your next gathering a hit! With its bright flavors and easy prep, it’s a must-try for any occasion. What’s your favorite twist on this classic? Let me know in the comments—I’d love to hear your ideas!

Southern-Style Chocolate Cobbler Recipe: Easy and Delicious

There’s something undeniably comforting about Southern desserts, and this Southern-style chocolate cobbler recipe is no exception. Growing up, I vividly remember the aroma of rich chocolate wafting through my grandmother’s kitchen every Sunday afternoon. This dessert quickly became a family favorite, not just for its decadent taste but also for its simplicity. Imagine a dessert that combines the gooeyness of a molten lava cake with the homestyle charm of a cobbler. Intrigued? Let’s dive into this delightful treat that’s both easy to prepare and irresistibly delicious.

Recipe Snapshot

  • Prep Time: 15 minutes
  • Cook Time: 25 minutes
  • Servings: 6
  • Difficulty: Medium

Chocolate Cobbler Recipe Ingredients List

For the Batter:

  • 1/2 cup (113g) unsalted butter
  • 1 1/2 cups (300g) granulated sugar
  • 4 tablespoons (24g) unsweetened cocoa powder
  • 2 cups (250g) all-purpose flour
  • 2 teaspoons baking powder
  • 1/4 teaspoon salt
  • 1 cup (240ml) milk
  • 2 teaspoons vanilla extract

For the Topping:

  • 2 cups (400g) granulated sugar
  • 1/2 cup (30g) unsweetened cocoa powder
  • 3 cups (720ml) boiling water
  • Vanilla ice cream, for serving (optional)

Step-by-Step Instructions

  1. Preheat the Oven: Set your oven to 350°F (175°C). Place the butter in a 9×13-inch (23×33 cm) baking dish and let it melt in the oven as it preheats. Once melted, remove the dish and set it aside.
  2. Prepare the Batter: In a large bowl, combine 1 1/2 cups sugar, 4 tablespoons cocoa powder, flour, baking powder, and salt. Stir in the milk and vanilla extract until the mixture is smooth. Pour this batter over the melted butter in the baking dish. Do not stir; the batter should float on top of the butter.
  3. Add the Topping: In a separate bowl, mix 2 cups sugar and 1/2 cup cocoa powder. Evenly sprinkle this mixture over the batter in the baking dish.
  4. Pour Boiling Water: Carefully pour the boiling water over the sugar and cocoa mixture. Again, do not stir. This step creates the luscious molten center during baking.
  5. Bake: Place the baking dish in the preheated oven and bake for 35-40 minutes, or until the top is set and slightly crispy. The bottom will remain gooey, forming a rich chocolate sauce.
  6. Cool and Serve: Allow the cobbler to cool for about 15 minutes before serving. This cooling period helps the sauce thicken slightly. Serve warm, preferably with a scoop of vanilla ice cream to balance the rich chocolate flavor.

Cooking Tips and Variations

  • Alternative Flours: If you’re looking to make this dessert gluten-free, substitute the all-purpose flour with a gluten-free flour blend in equal measure.
  • Dairy-Free Option: For a dairy-free version, replace the butter with coconut oil and use almond or oat milk instead of regular milk.
  • Flavor Enhancements: Adding a teaspoon of instant espresso powder to the batter can intensify the chocolate flavor. Alternatively, a pinch of cinnamon or chili powder can provide a warm, spicy kick.
  • Serving Suggestions: While vanilla ice cream is a classic pairing, consider topping your cobbler with whipped cream or a drizzle of caramel sauce for added indulgence.

Nutritional Information

  • Calories: 480
  • Protein: 4g
  • Carbohydrates: 85g
  • Fat: 15g
  • Saturated Fat: 9g
  • Cholesterol: 40mg
  • Sodium: 200mg
  • Fiber: 3g
  • Sugar: 65g

Note: Nutritional values are approximate and can vary based on specific ingredients used.

FAQs

Q: Can I prepare this chocolate cobbler in advance?

A: Yes, you can prepare the batter and topping separately in advance. When ready to bake, assemble as directed and bake just before serving to enjoy the best texture and flavor.

Q: How should I store leftovers?

A: Store any leftover cobbler in an airtight container in the refrigerator for up to 3 days. Reheat individual servings in the microwave for about 20-30 seconds before enjoying.

Q: Can I add nuts or other mix-ins to the cobbler?

A: Absolutely! Chopped pecans or walnuts make a delightful addition, adding a crunchy texture that complements the gooey chocolate. Simply fold them into the batter before pouring it over the melted butter.

Q: What if I don’t have a 9×13-inch baking dish?

A: You can use a similar-sized dish, such as an 11×7-inch baking dish. Just ensure the batter and toppings are spread evenly, and adjust the baking time as needed, checking for doneness.

Q: Is it possible to reduce the sugar content?

A: While sugar contributes to the cobbler’s texture and flavor, you can experiment by reducing it slightly. Keep in mind that altering the sugar may affect the consistency of the sauce and overall sweetness.

This Southern-style chocolate cobbler is more than just a dessert; it’s a cherished tradition that brings warmth and joy to any gathering.